DATASCI 350 - Data Science Computing
Lecture 17 - Cloud Computing II
Where we left off
You now have an AWS account
- Last class: why rent servers instead of buying them
- Animoto and The Washington Post showed what renting makes possible
- IaaS, PaaS, SaaS, FaaS and the main AWS services
- The October 2025
us-east-1outage - Your free plan account and zero-spend budget
- Amazon Textract on a scanned document
- So far, everything happened in the browser. Today we use the terminal (as always!) 😂
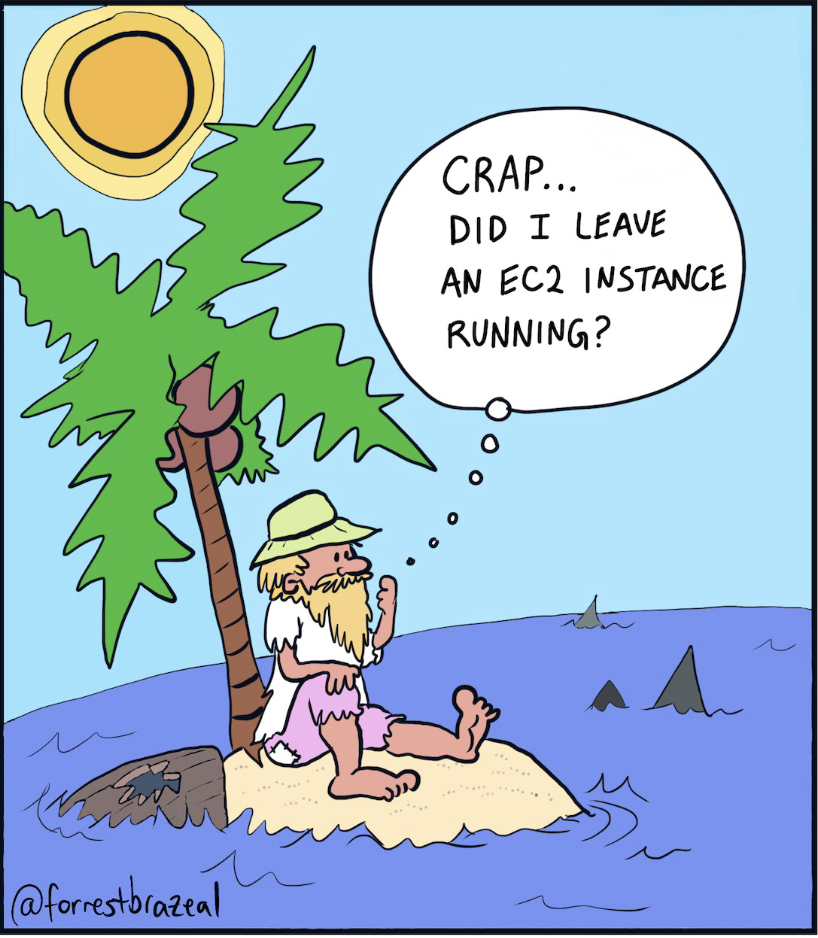
Cartoon by Forrest Brazeal
Today’s plan
- Launch an EC2 instance from the AWS console
- Connect to it with SSH and a key pair
- Windows users: keep the key in WSL, where
chmodworks - Install software with
aptand copy files withscp - Stop and terminate instances, so the bill stays at zero
- CloudShell: a terminal in the browser, with the
awscommand line - Activity 01: run Jupyter on the instance
- Activity 02: analyse data in the cloud (time permitting)
EC2 instances in a nutshell
- EC2 is a virtual server in the cloud, usually running Ubuntu or Amazon Linux
- Virtualisation runs many instances on one physical machine
- A virtual machine is a software copy of a computer
- A hypervisor shares out the hardware between them
- Instance types differ in CPU, memory, storage, and network
- T3 and M7i are general purpose
- C7i is compute-optimised, and R7i is memory-optimised
- Six types are free tier eligible. We use
t3.micro
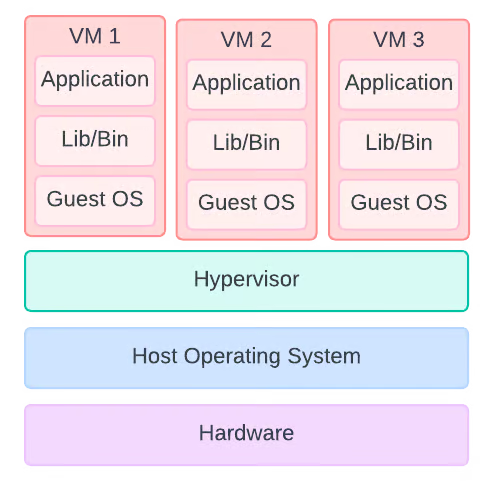
Source: DataCamp
Ubuntu Linux
- Linux is an open-source operating system
- It runs most of the servers on the internet
- It is free to install, and you can change any part of it
- Ubuntu is the most widely used Linux distribution
- It is based on Debian and built for ease of use
- Long-term support (LTS) versions get 5 years of updates
- It has desktop and server editions
- Google, Amazon, and Microsoft all offer Ubuntu instances
- WSL runs Linux inside Windows, Ubuntu by default
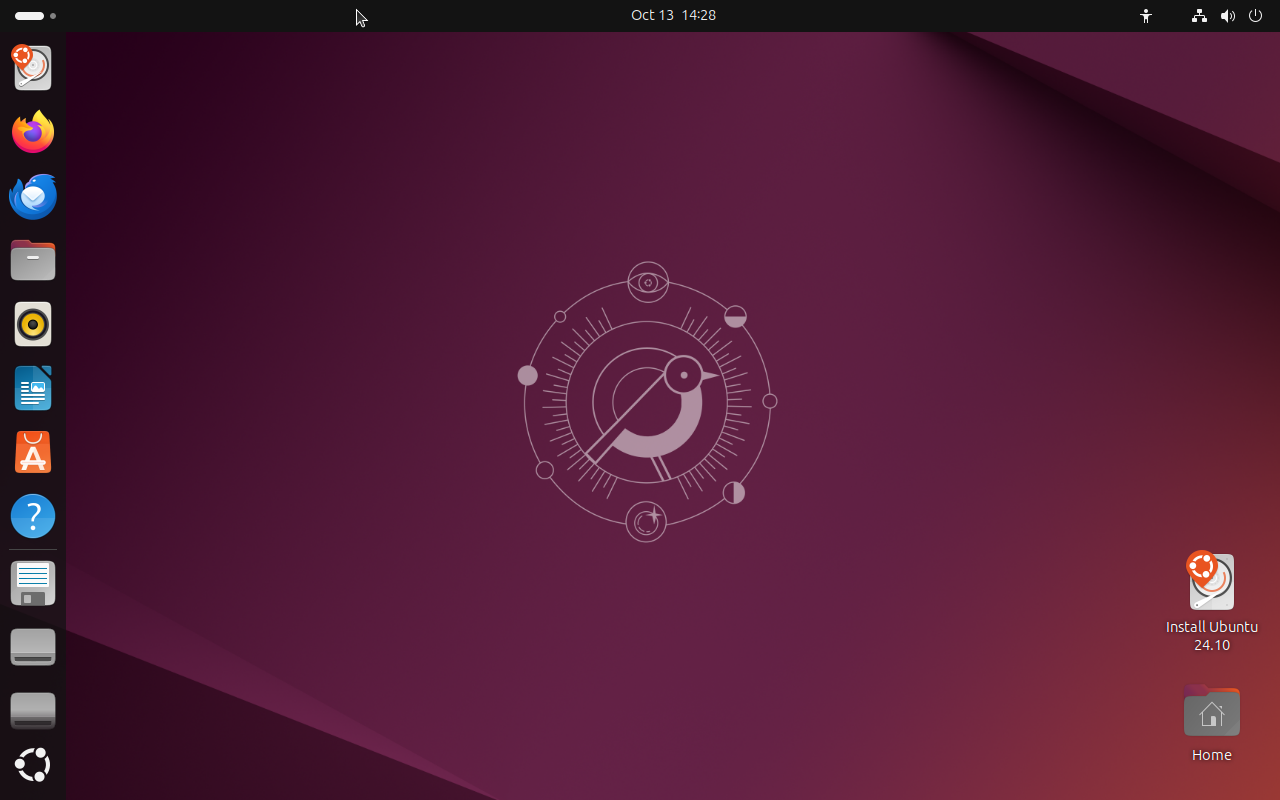
- Ubuntu uses bash as its default login shell
- So the commands from the shell module work on Ubuntu
Ubuntu server
- Ubuntu has a GUI, but we will use only the terminal
- A bare-bones instance is cheaper and faster than a full desktop
- The terminal has everything you need to manage it
- The commands are the same:
ls,cd,pwd, and so on sudoruns a command as root, the superuser- Root has full control over the system, so be careful with it!
apt(Advanced Package Tool) installs softwareapt updaterefreshes the package listapt installinstalls a package
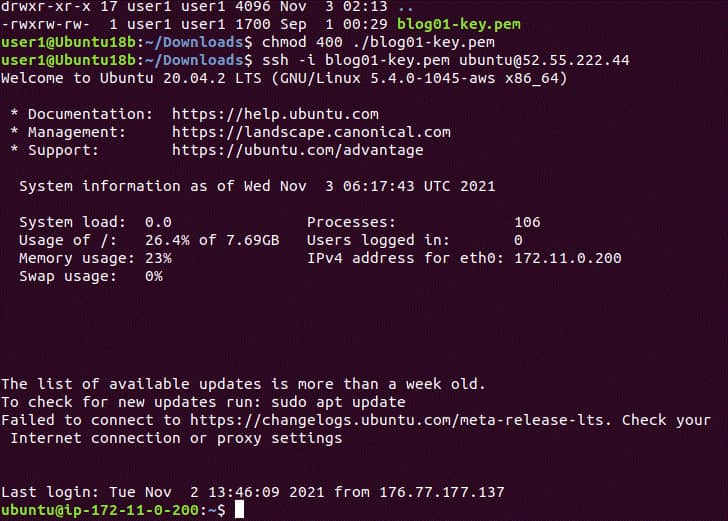
sudo apt install python3installs Python 3sudo apt install python3-pipinstalls pip
Windows Subsystem for Linux (WSL)
A real Linux system inside Windows
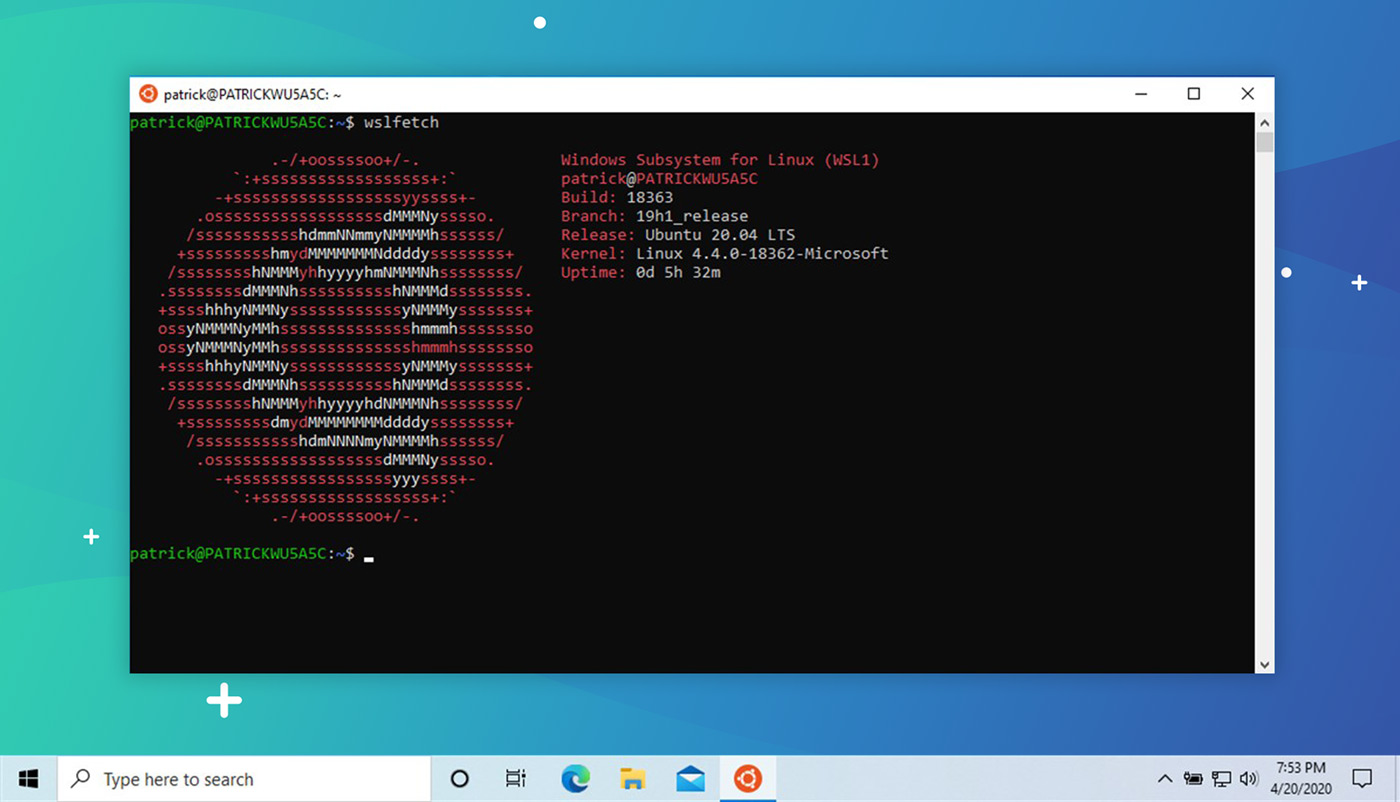
- WSL runs Linux inside Windows. It installs Ubuntu by default
- You get the same
bashterminal that Mac and Linux users have, so every command in this course works - Windows runs it in a small virtual machine and starts it for you when you open the Ubuntu app
- Tutorial 06 has the installation steps. I hope many of you have done it already! 😊
- To open it, type
Ubuntuin the Start menu - WSL has two separate filesystems:
- Your Linux home,
/home/<your-linux-name>, also written~ - Your Windows drive
C:, which Linux sees as/mnt/c/
- Your Linux home,
Step 01: Launching an EC2 instance
- Now we can launch an EC2 instance!
- Sign in to the AWS Console and search for EC2
- On the EC2 Dashboard, click the orange Launch instance button
- Choose an AMI (Amazon Machine Image). We pick Ubuntu, which is free tier eligible
- AWS has thousands of AMIs: Windows, macOS, and other Linux distributions
- Many come ready to run specific software, such as Jupyter, TensorFlow, or Docker
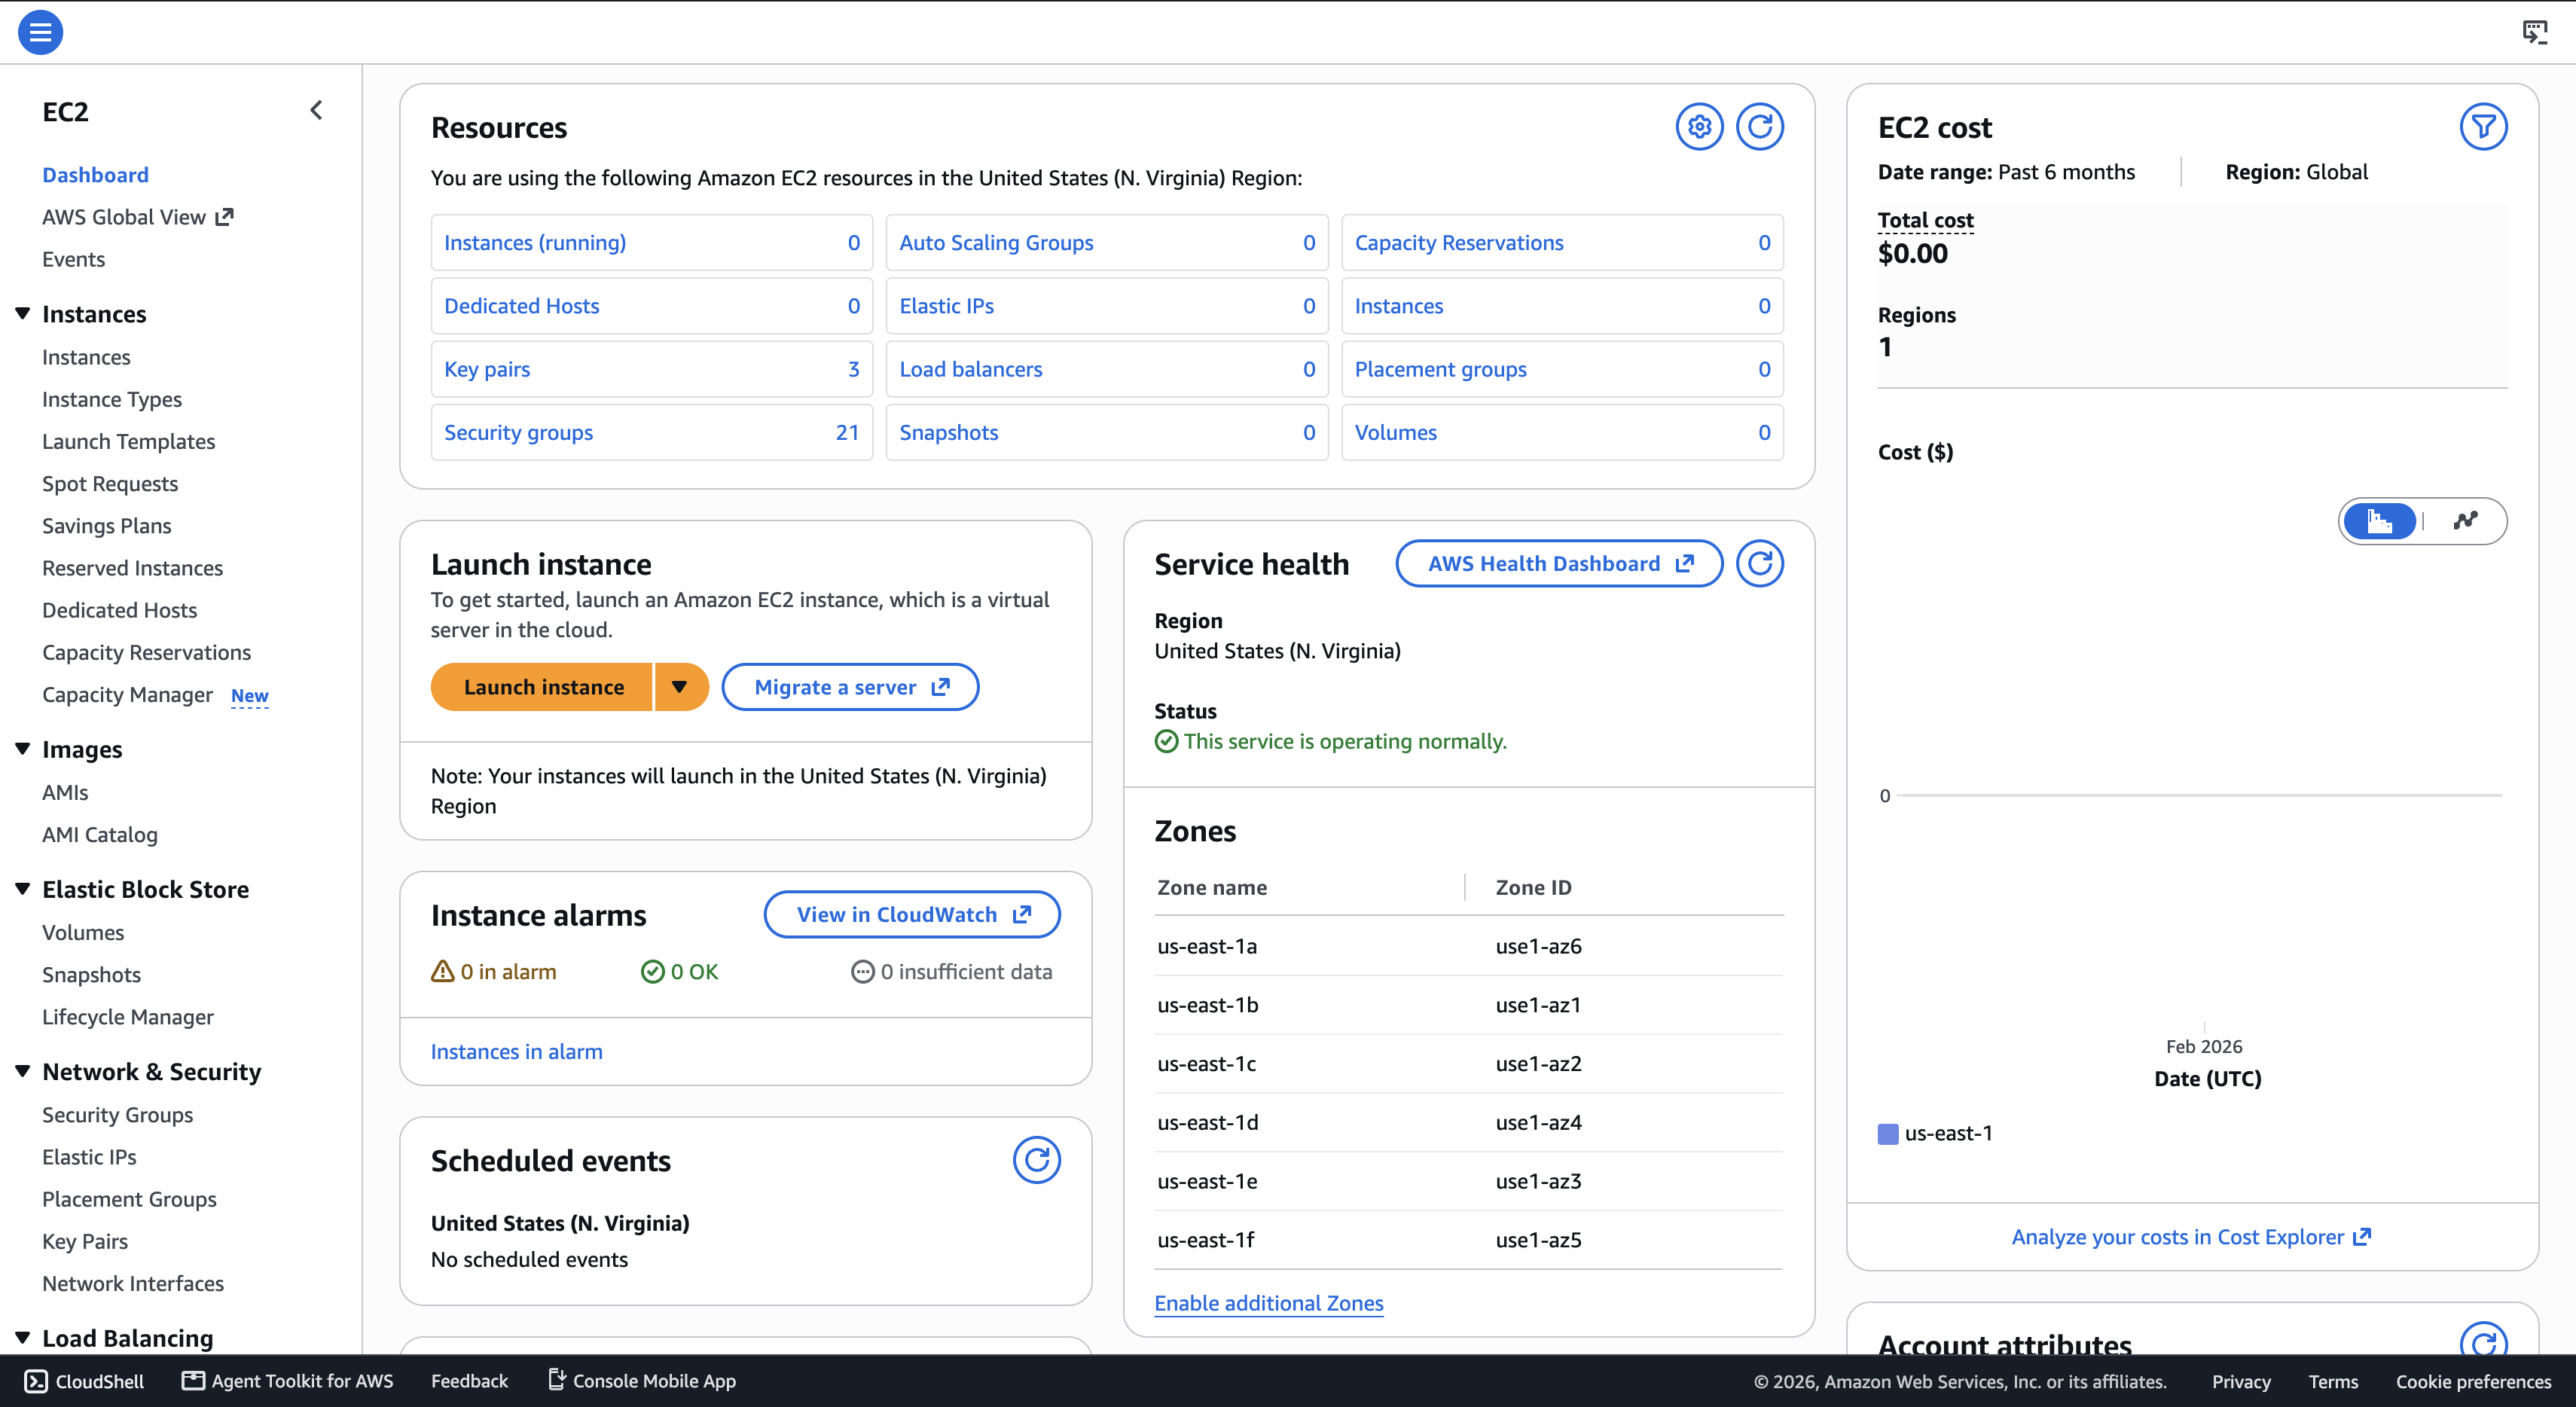
The EC2 Dashboard
Step 02: Choosing an instance type
- Type a name under
Name and tags, such asdatasci350 - Under
Application and OS Images, choose Ubuntu - The current release is
Ubuntu Server 26.04 LTS, markedFree tier eligible - Keep
64-bit (x86)as the architecture - Launch 1 instance for now
- The
Summarypanel on the right lists every choice before you launch - The next slide covers the instance type
- So far, so good? 😊
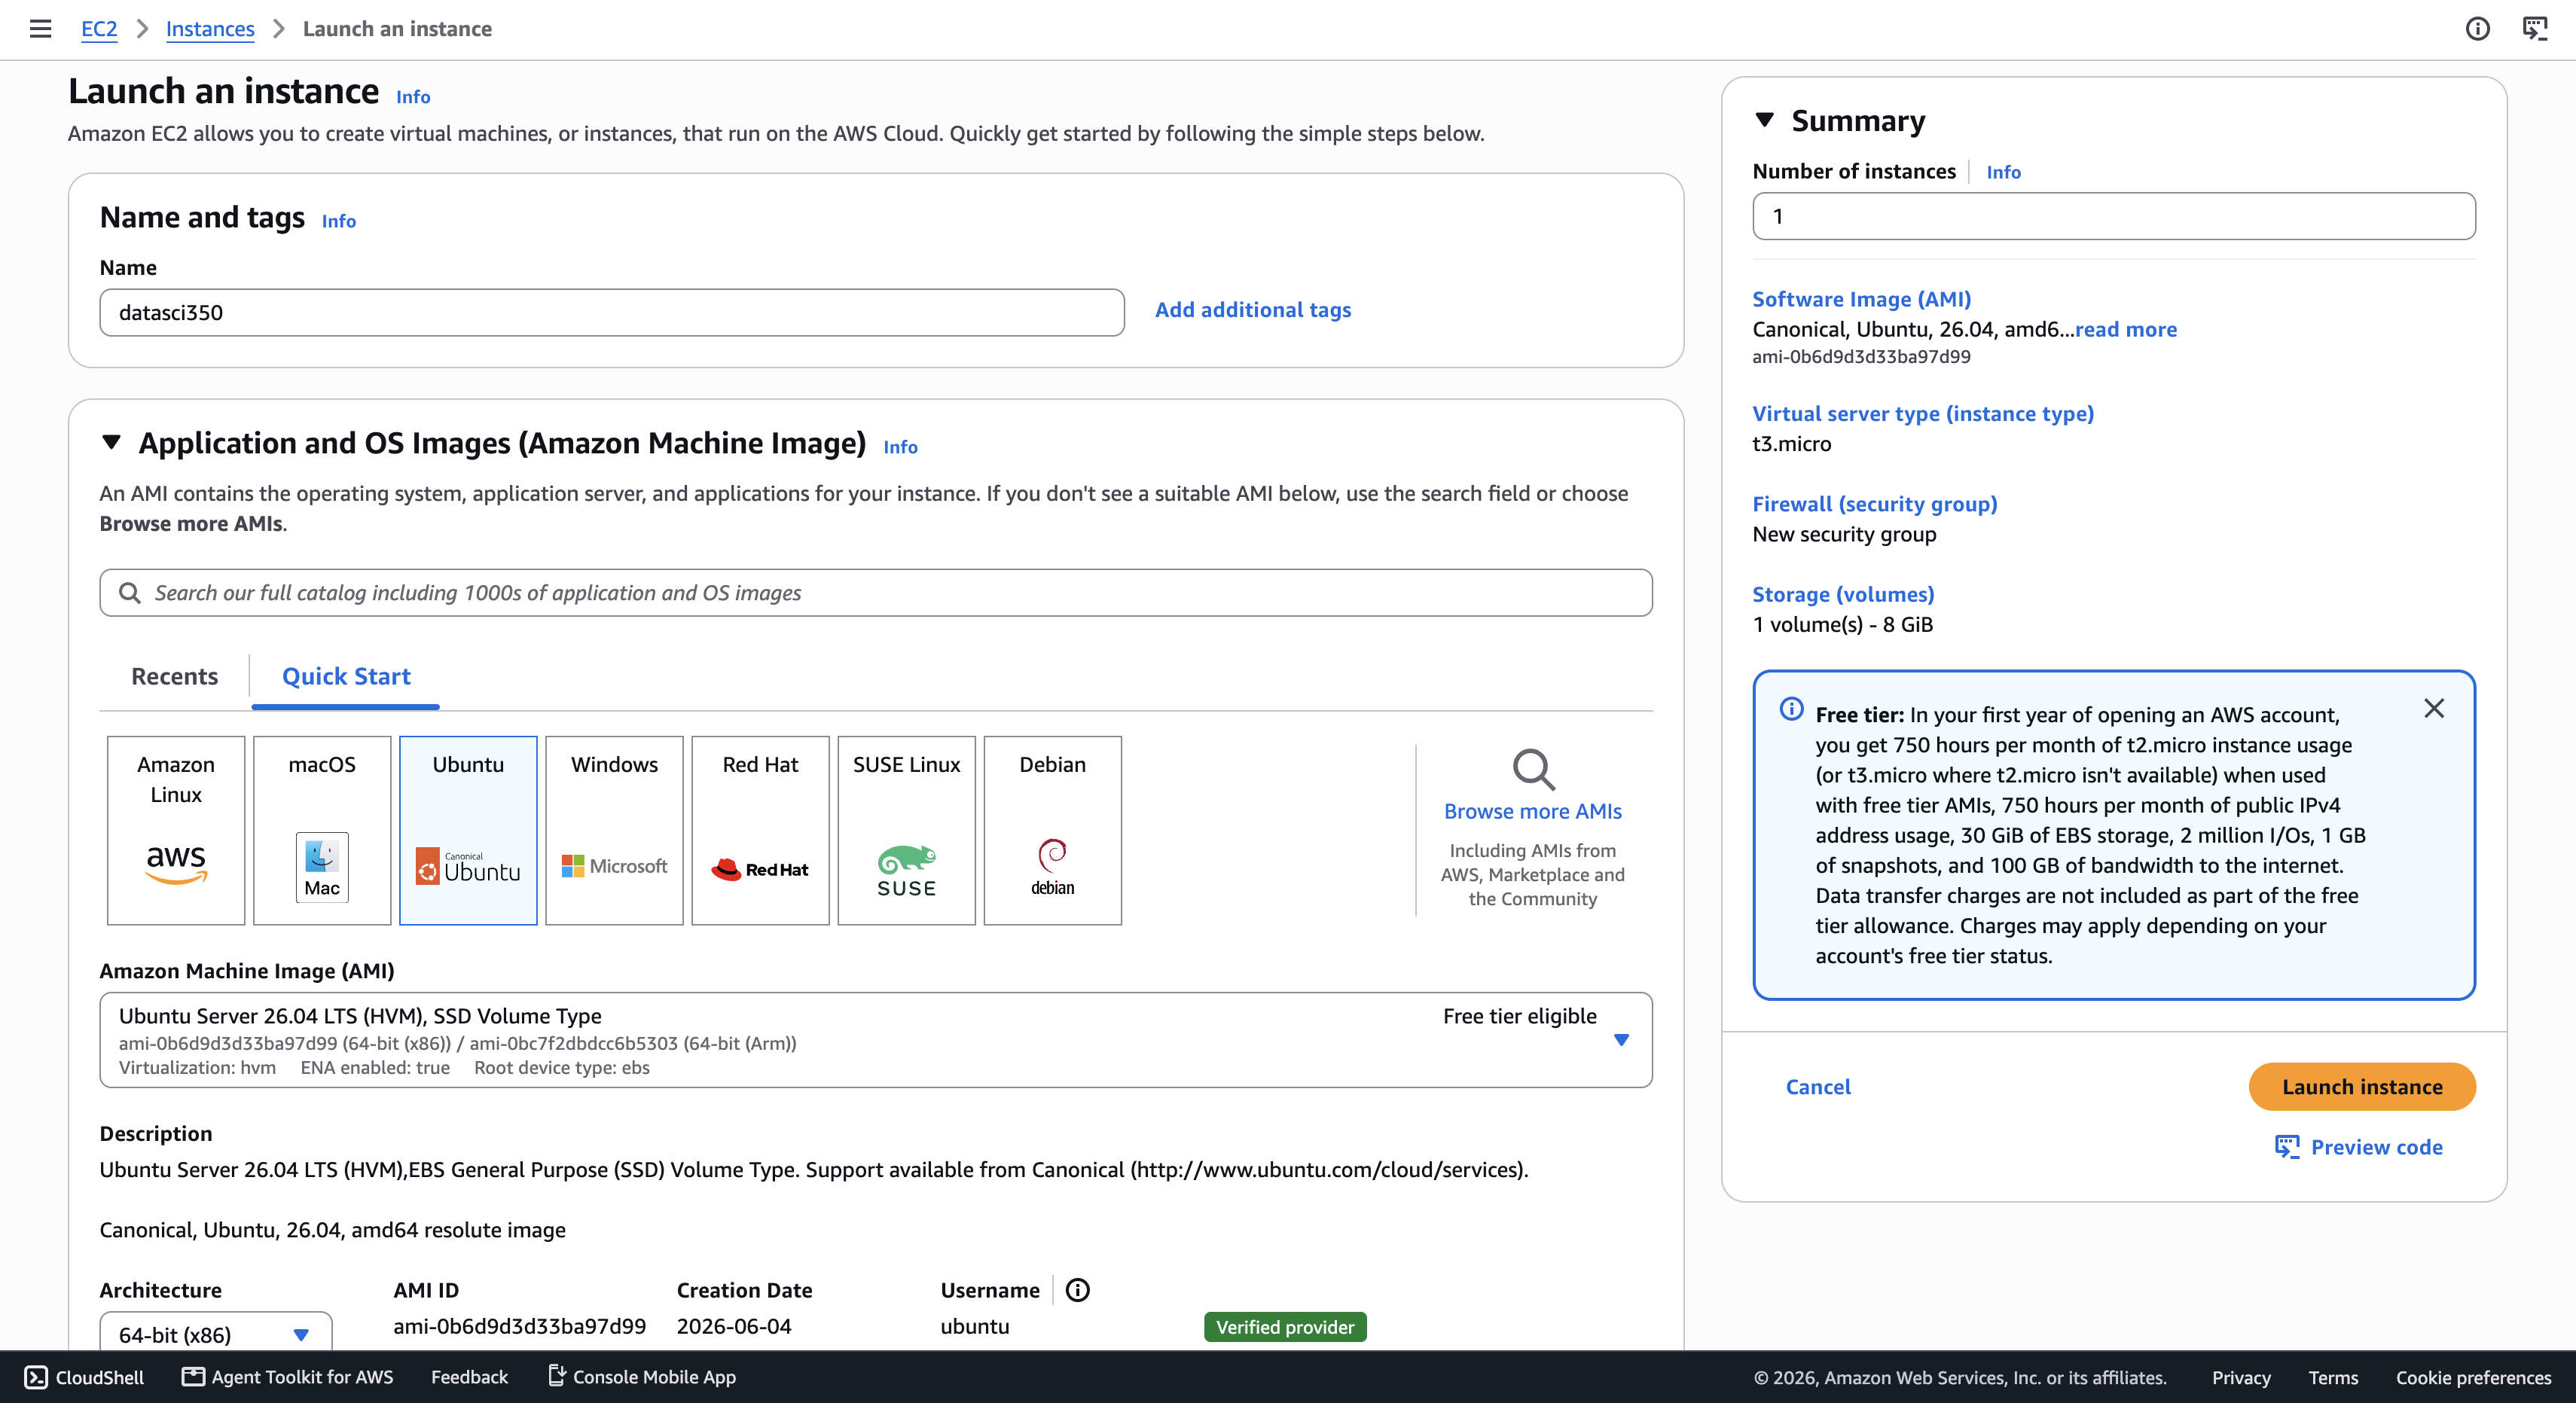
The launch wizard. Click the image to read the Summary panel
Which instance type is free?
The console’s own note is out of date
- Choose
t3.micro, labelledFree tier eligible - Accounts opened after 15 July 2025 can use six types:
t3.micro,t3.small,t4g.micro,t4g.small,c7i-flex.largeandm7i-flex.large - The dropdown shows the price of every type
- A
t3.microhas 2 vCPUs and 1 GiB of memory, and costs 0.0104 USD an hour on Linux - You can change the instance type later
The blue Free tier note in the Summary panel describes the old offer: 750 hours a month of t2.micro for a year. That offer ended for accounts opened after 15 July 2025. Your account runs on credits, and t2.micro is not on your list
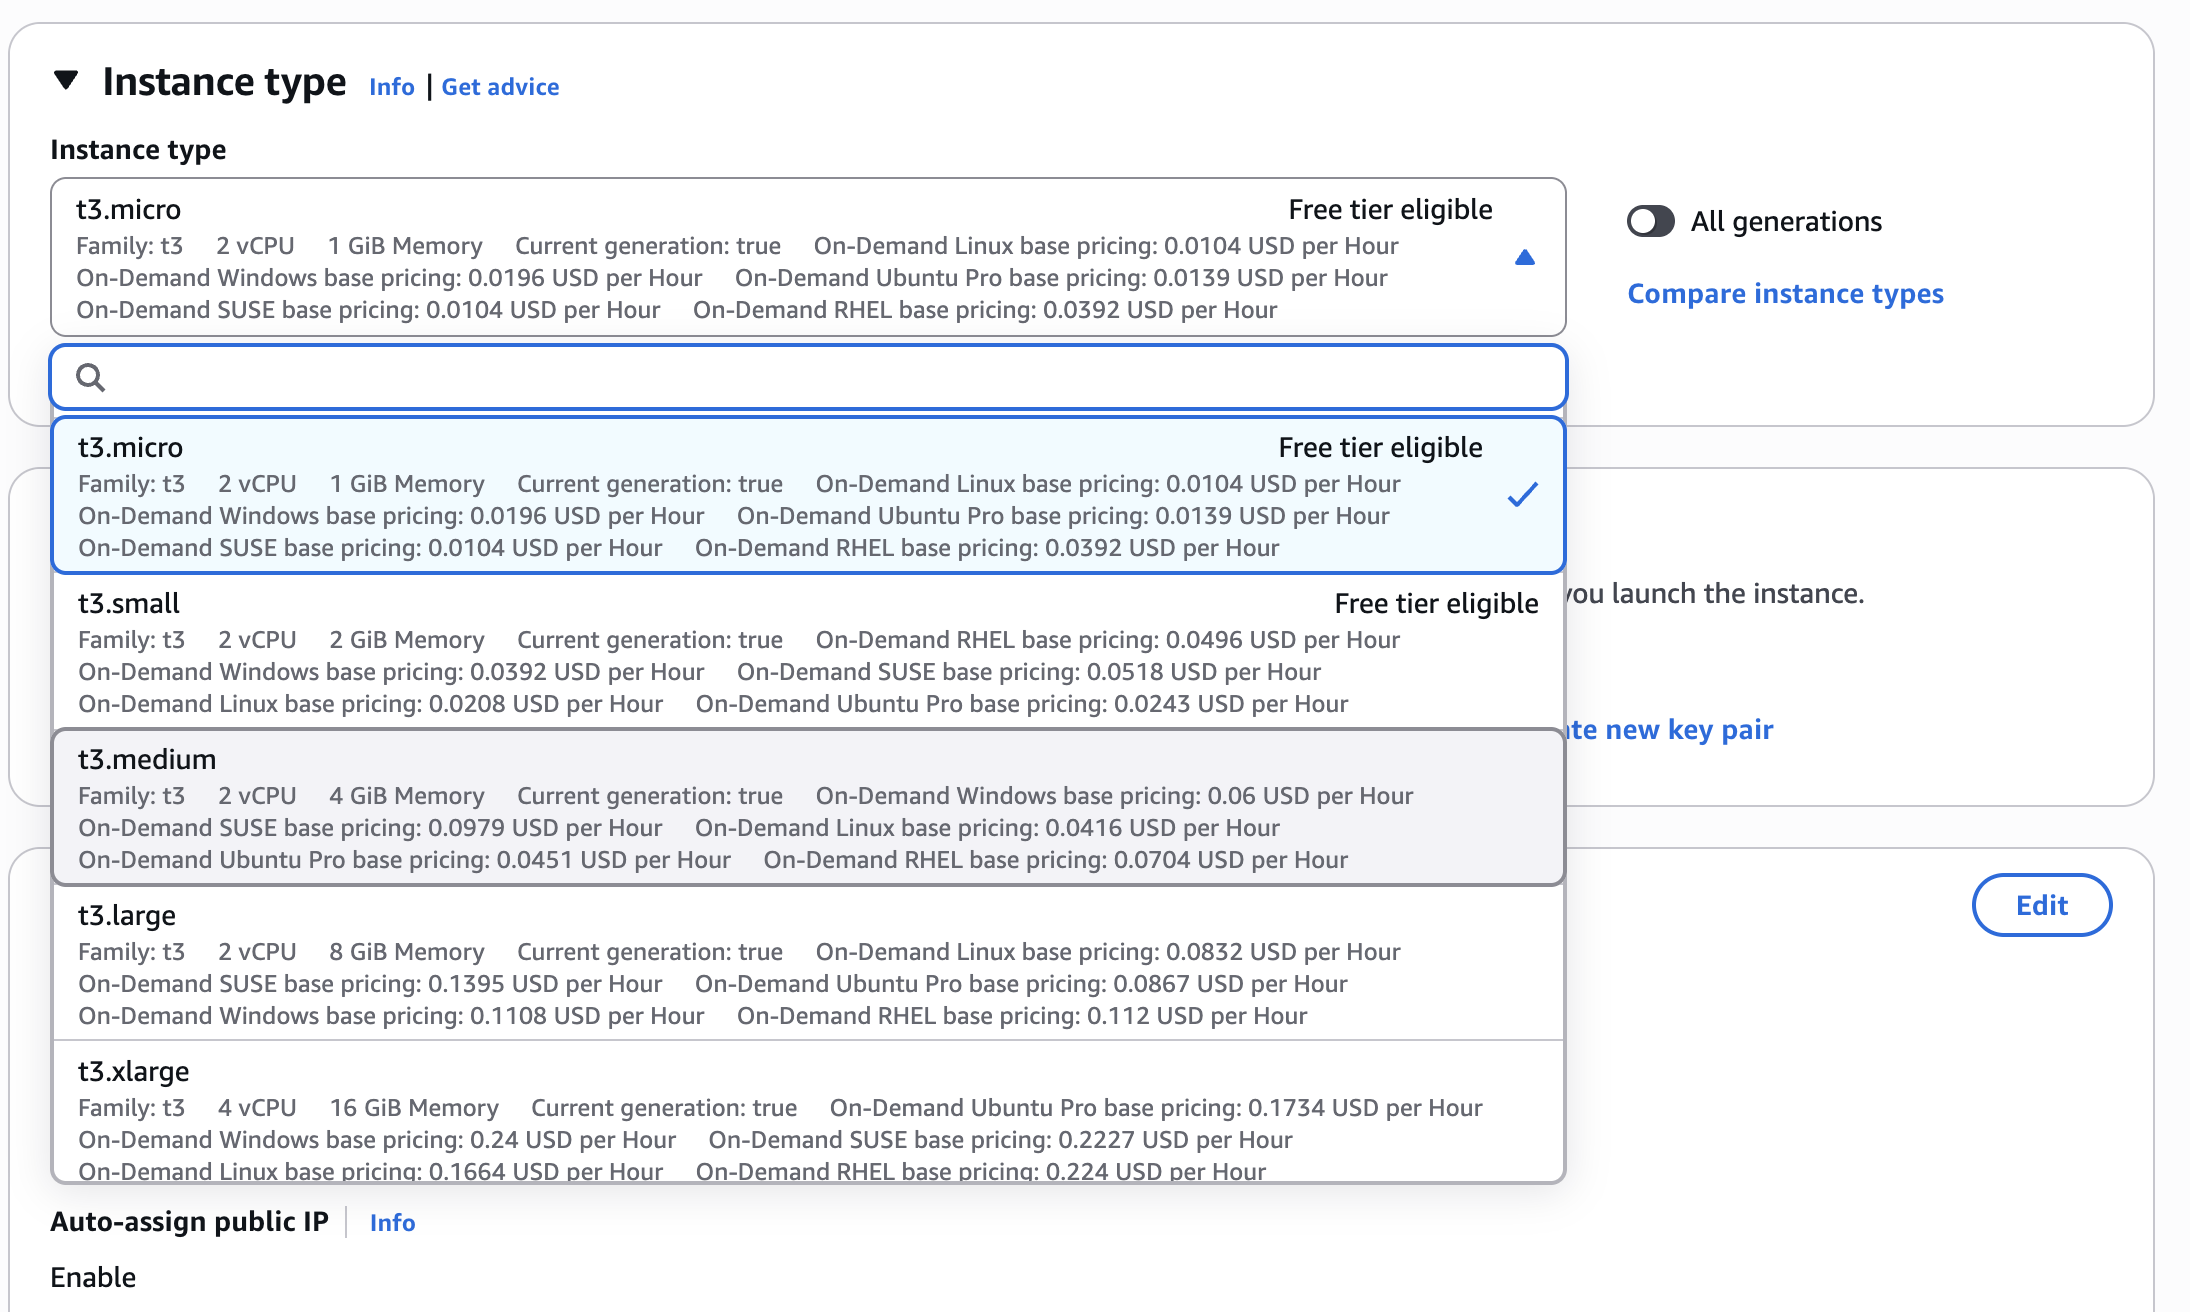
The instance type dropdown, with the hourly price under every entry
Step 03: Choose an SSH key pair
- Next, choose a key pair
- A key pair is two cryptographic keys that authenticate you to an instance
- You create it once and use it for all your instances
- Click
Create a new key pairand name it, e.g.datasci350 - Choose
ED25519and the.pemfile format - Click
Create key pairand save the file somewhere safe - You need it to log in over SSH, and AWS cannot send you another copy
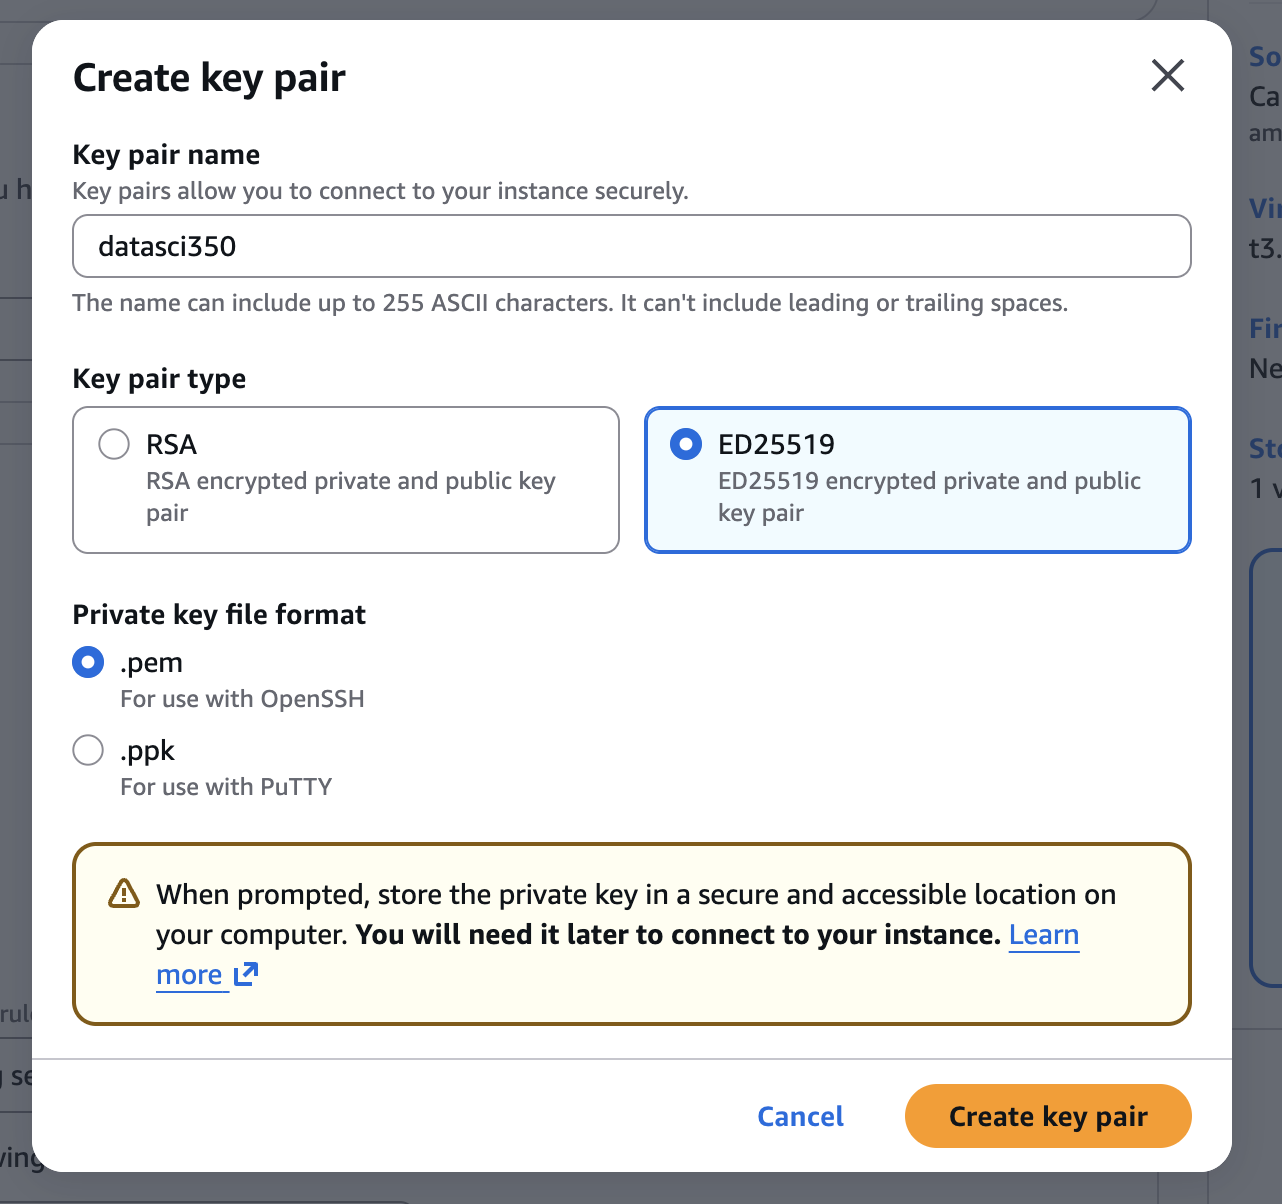
Step 04: Check HTTP/HTTPS options
- Under
Network settings, tickAllow HTTPS trafficandAllow HTTP trafficfrom the internet - This lets you reach web servers on your instance
- SSH (port 22) is open by default
- We open these ports to anyone for now
- In production, allow only what you need
- Why? Security! Every open port is a way in for attackers
- You can edit the security group later
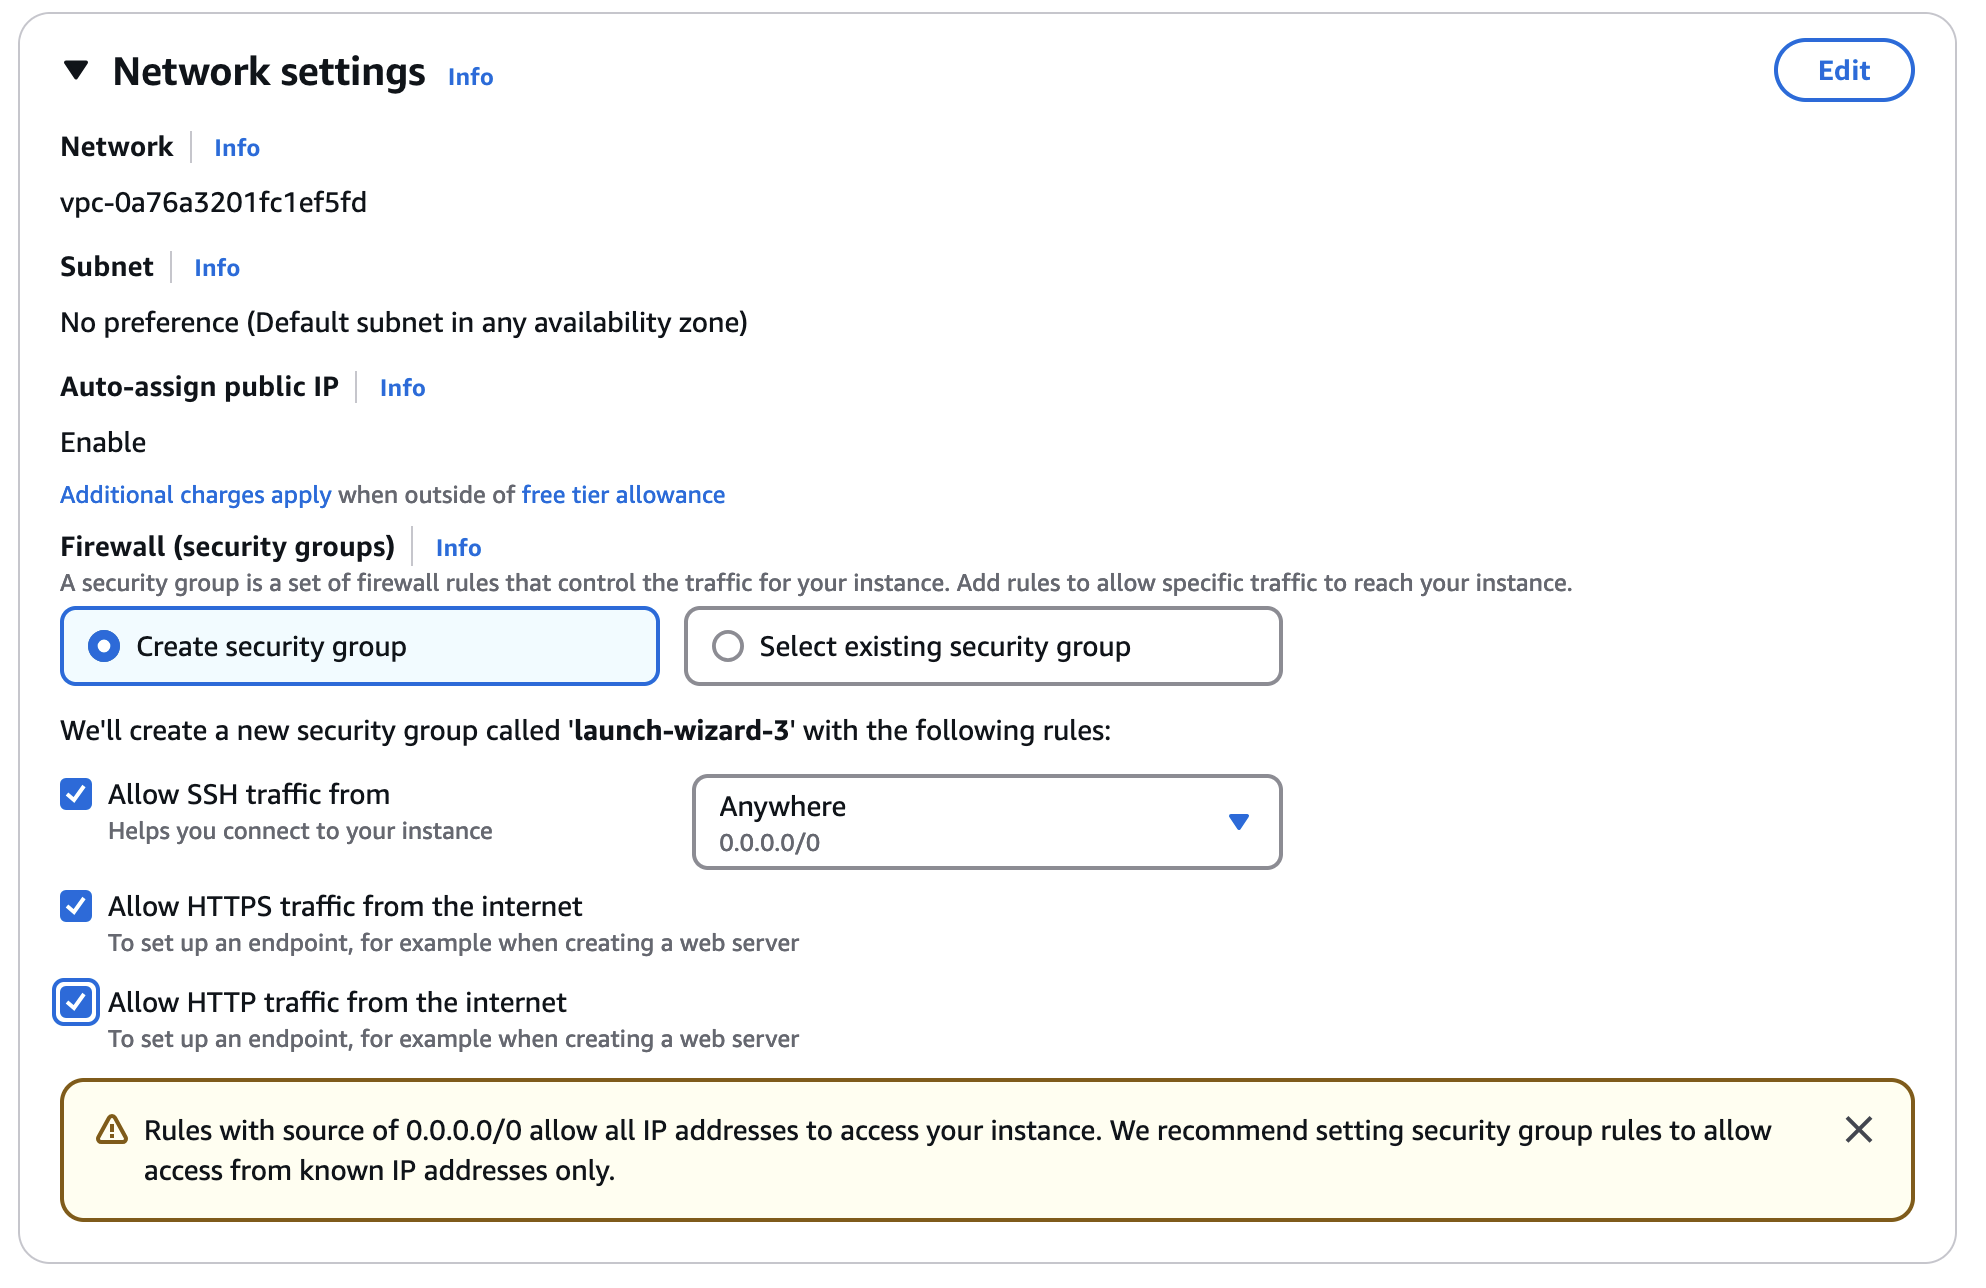
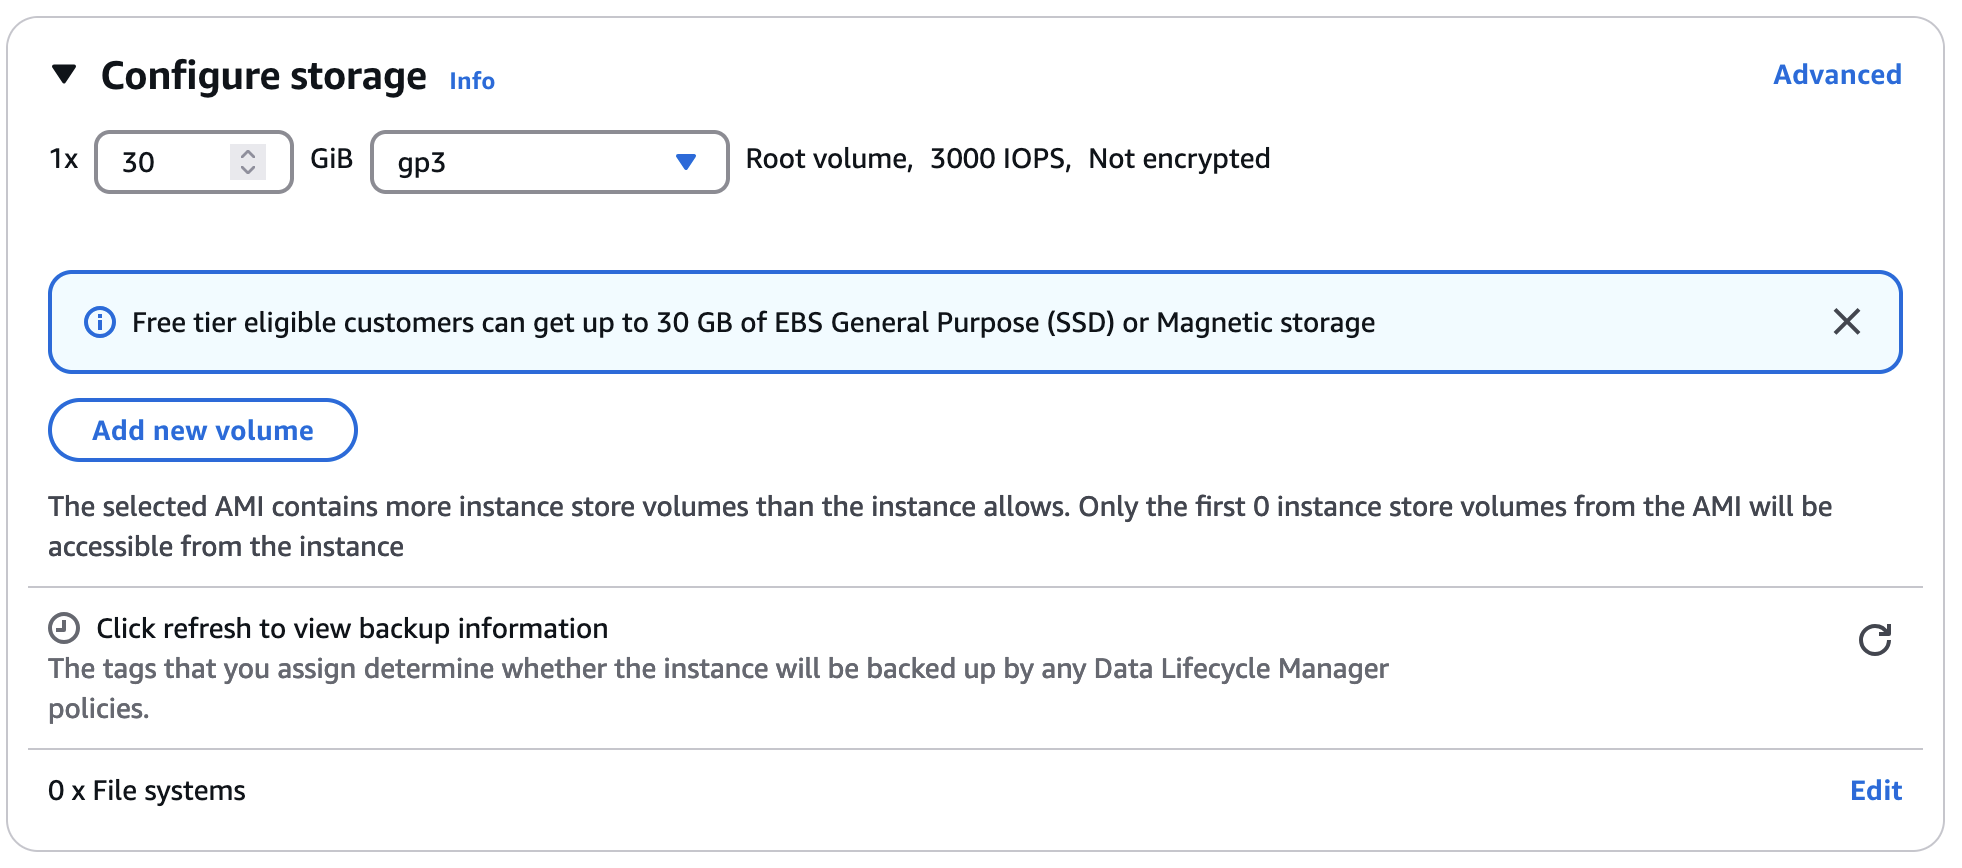
Step 05: Configure storage
- Under
Configure storage, you can resize theRootvolume - The default 8 GB is enough for today. A larger disk spends more credits
- You can add more volumes if you need them
gp3is the default type and works for most usesio2is the fastest and most expensive, for databases that need sub-millisecond latencysc1andst1are cheaper hard-disk types for rarely used data. They cannot be the root disk
- Now you just have to click on
Launch instance! 🚀
Step 06: Log in to the EC2 instance through SSH
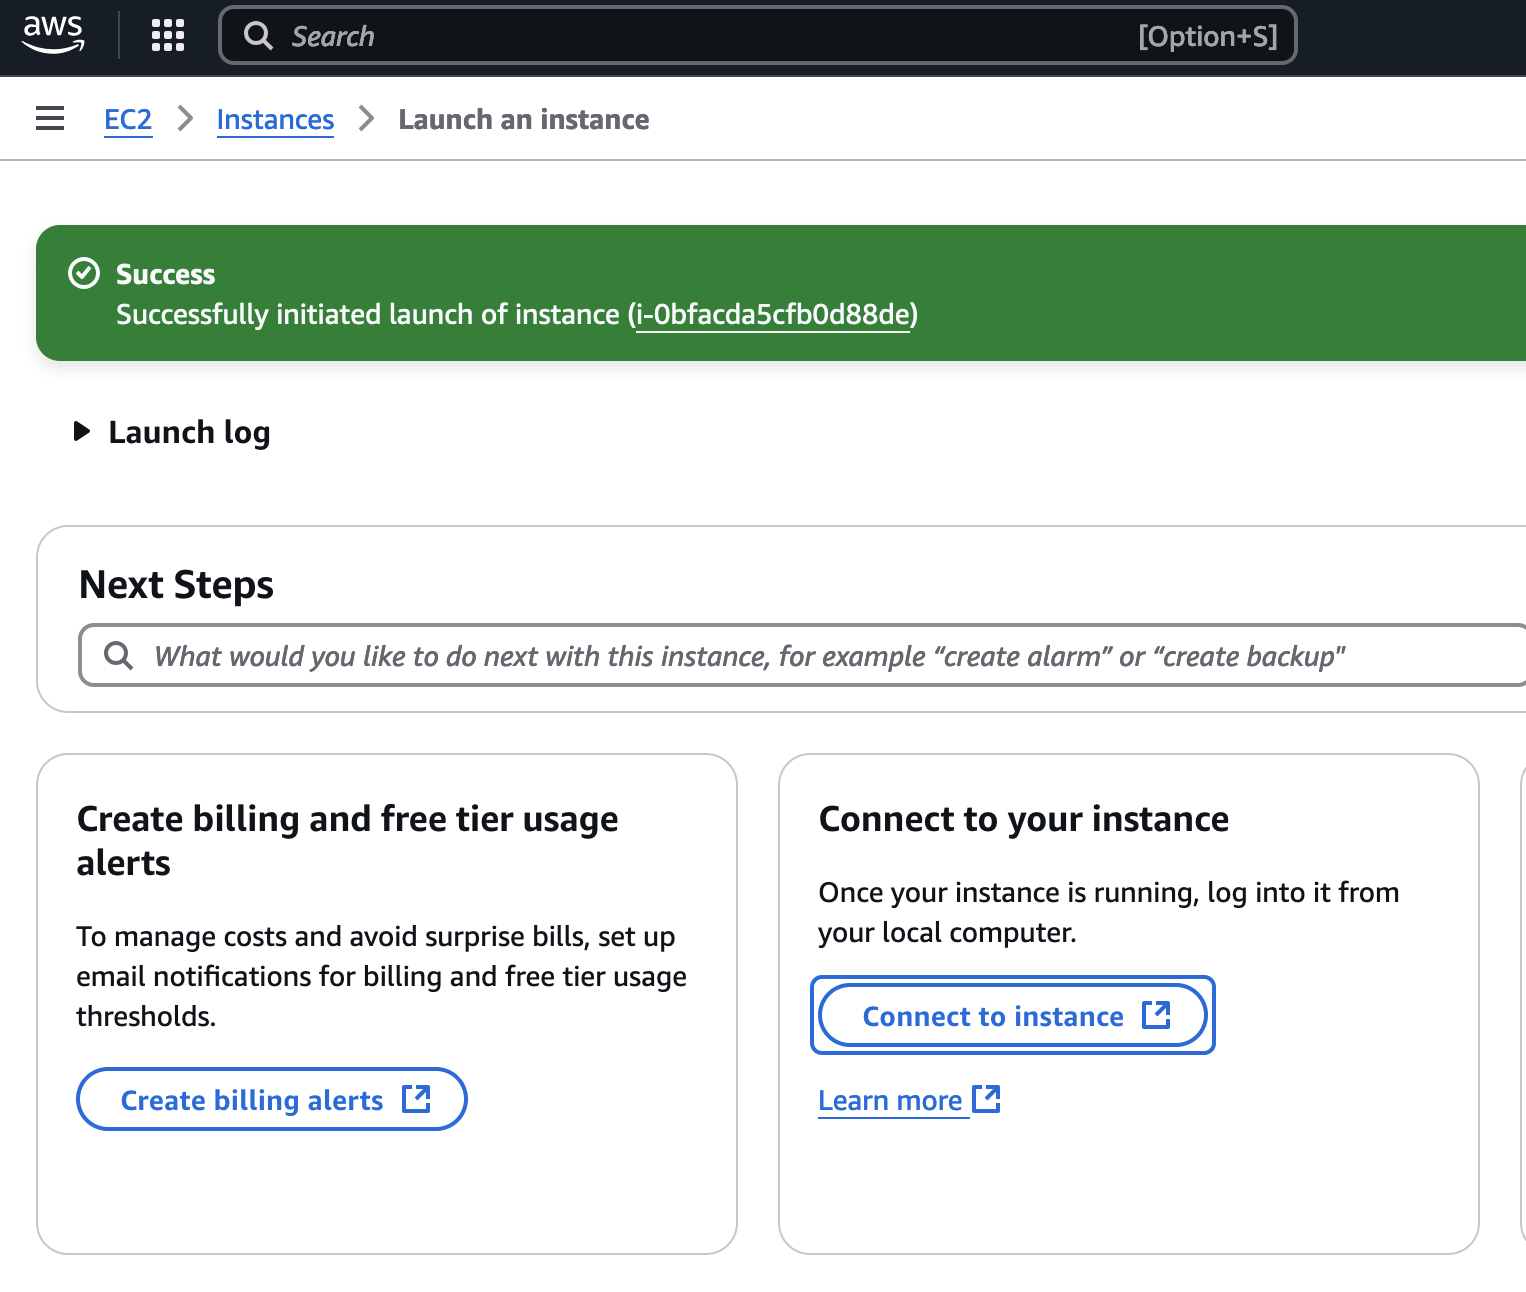
- After you click
Launch instance, open the Instances page - Click
Connect to instanceto see the instructions
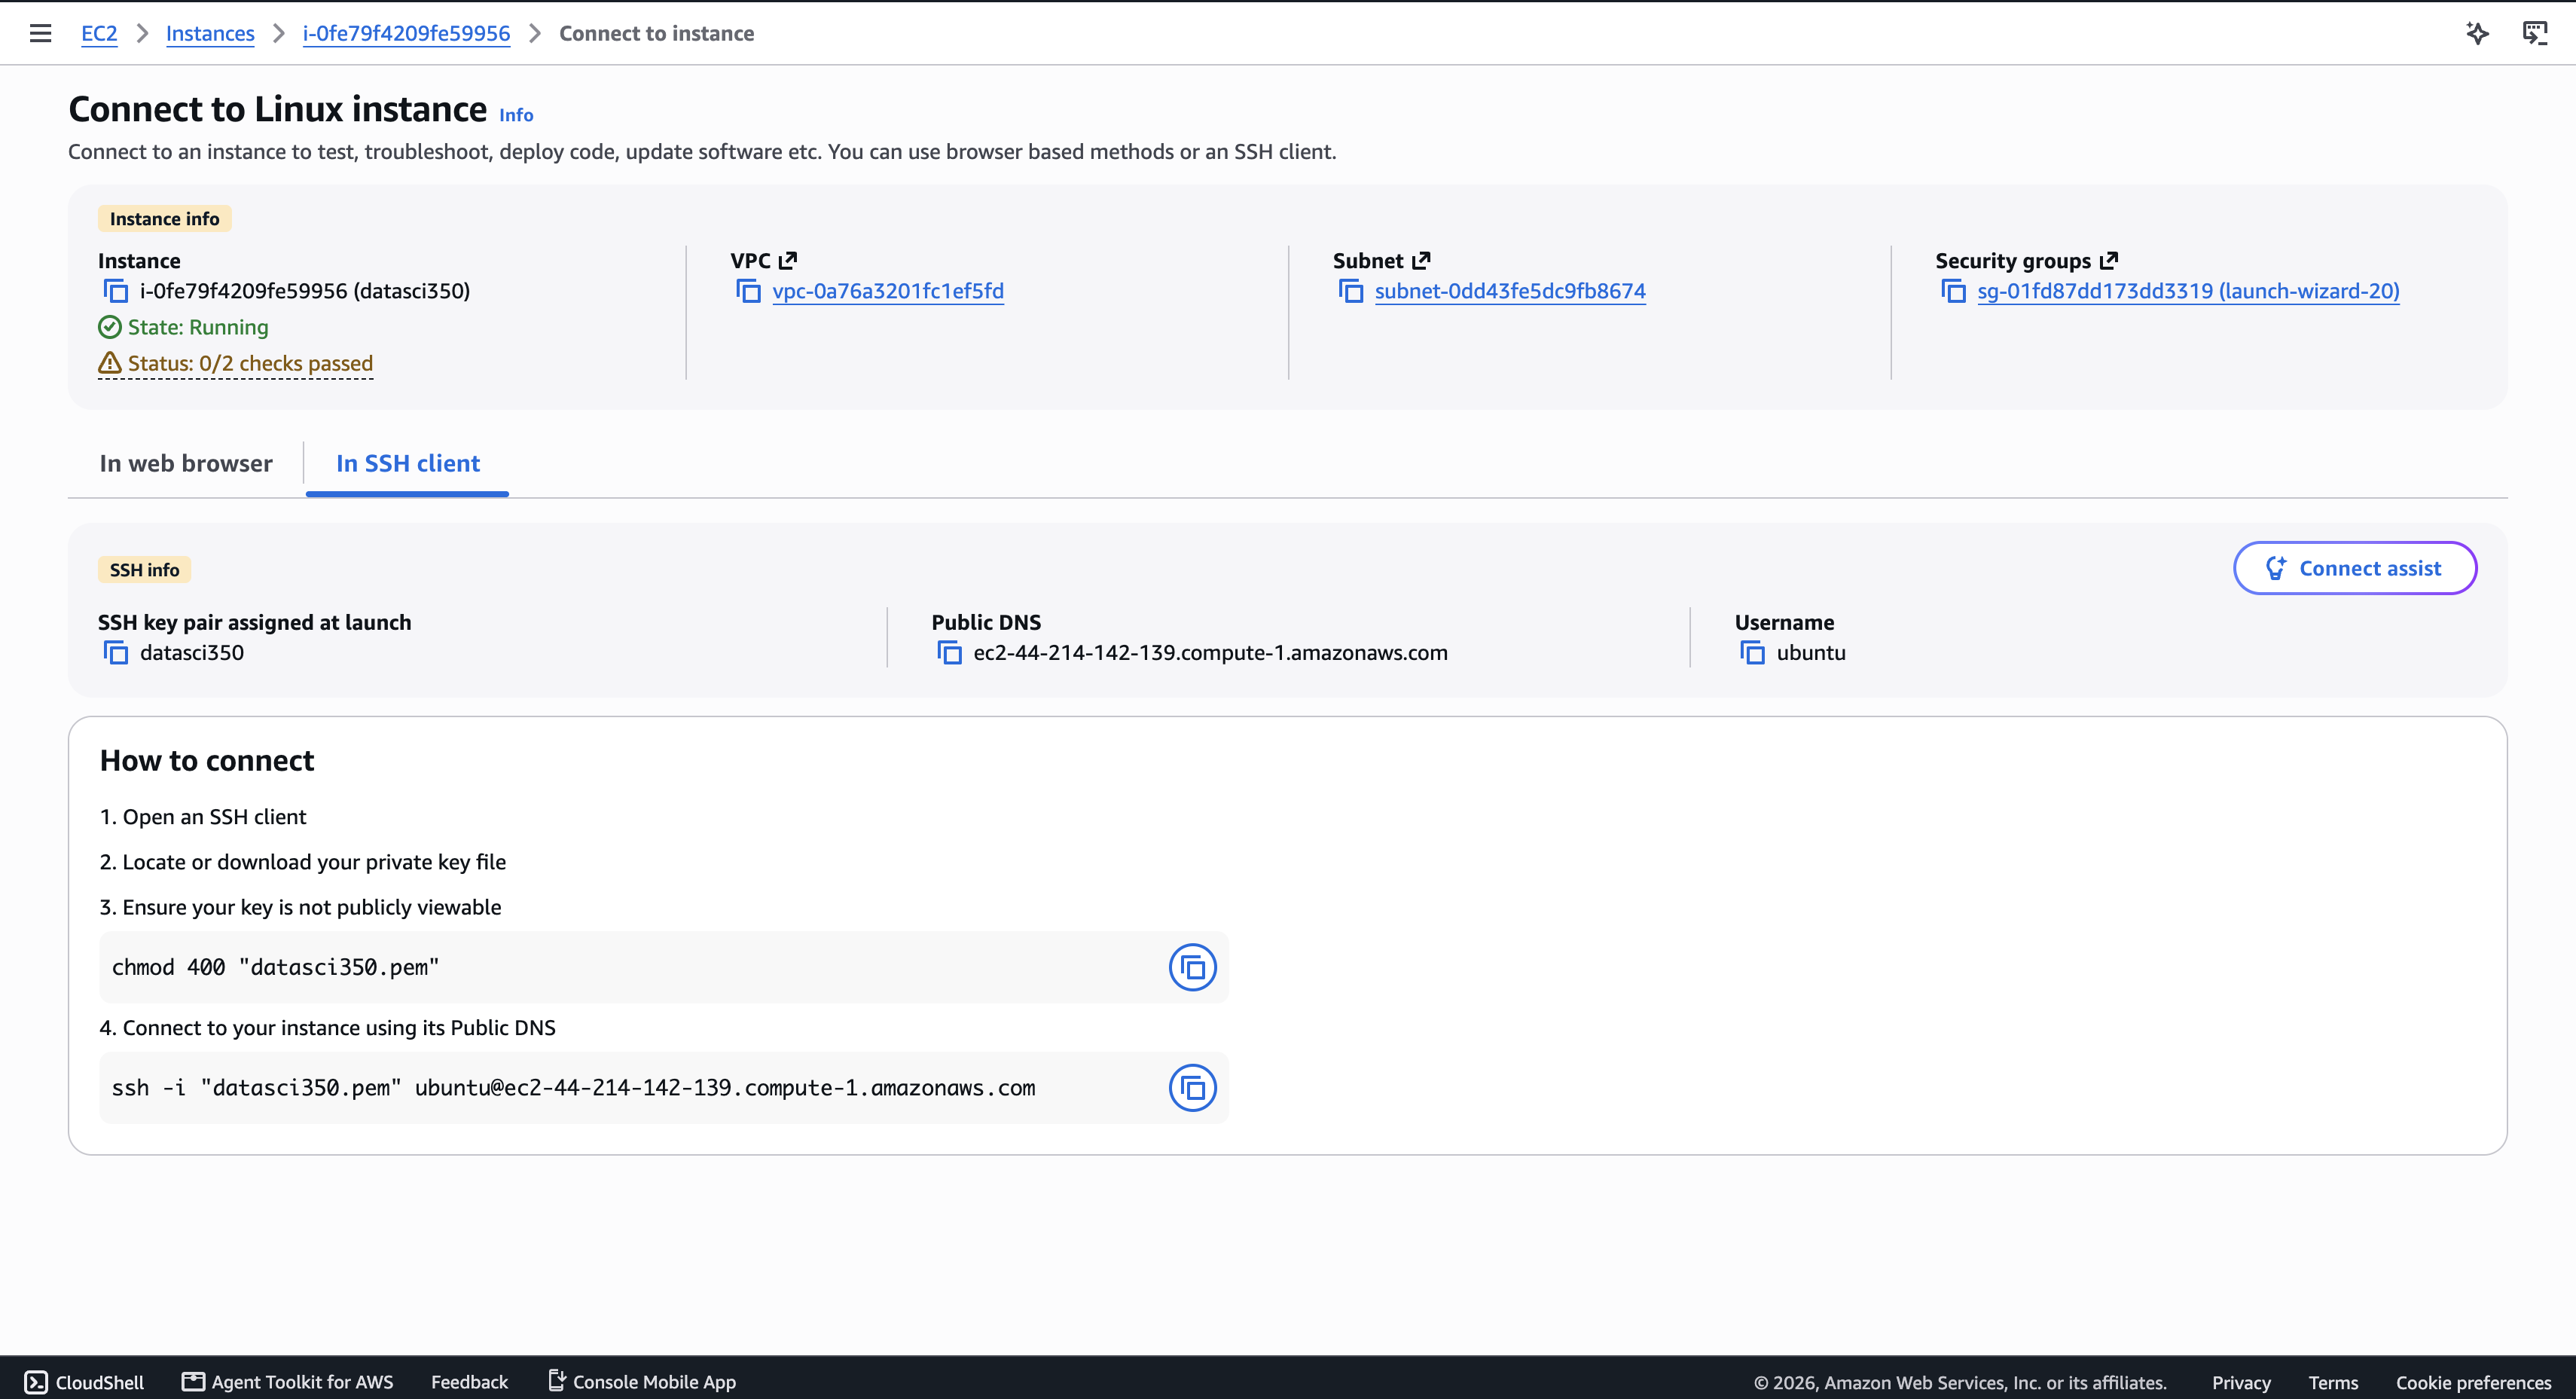
- Choose the
SSH clienttab - Open a terminal in the folder where you saved the key
- The console writes both commands for you under
How to connect:- Step 3:
chmod 400 "your-key.pem" - Step 4:
ssh -i "your-key.pem" ubuntu@your-public-dns
- Step 3:
And you are in! 🎉
Welcome to the cloud! 🌥️
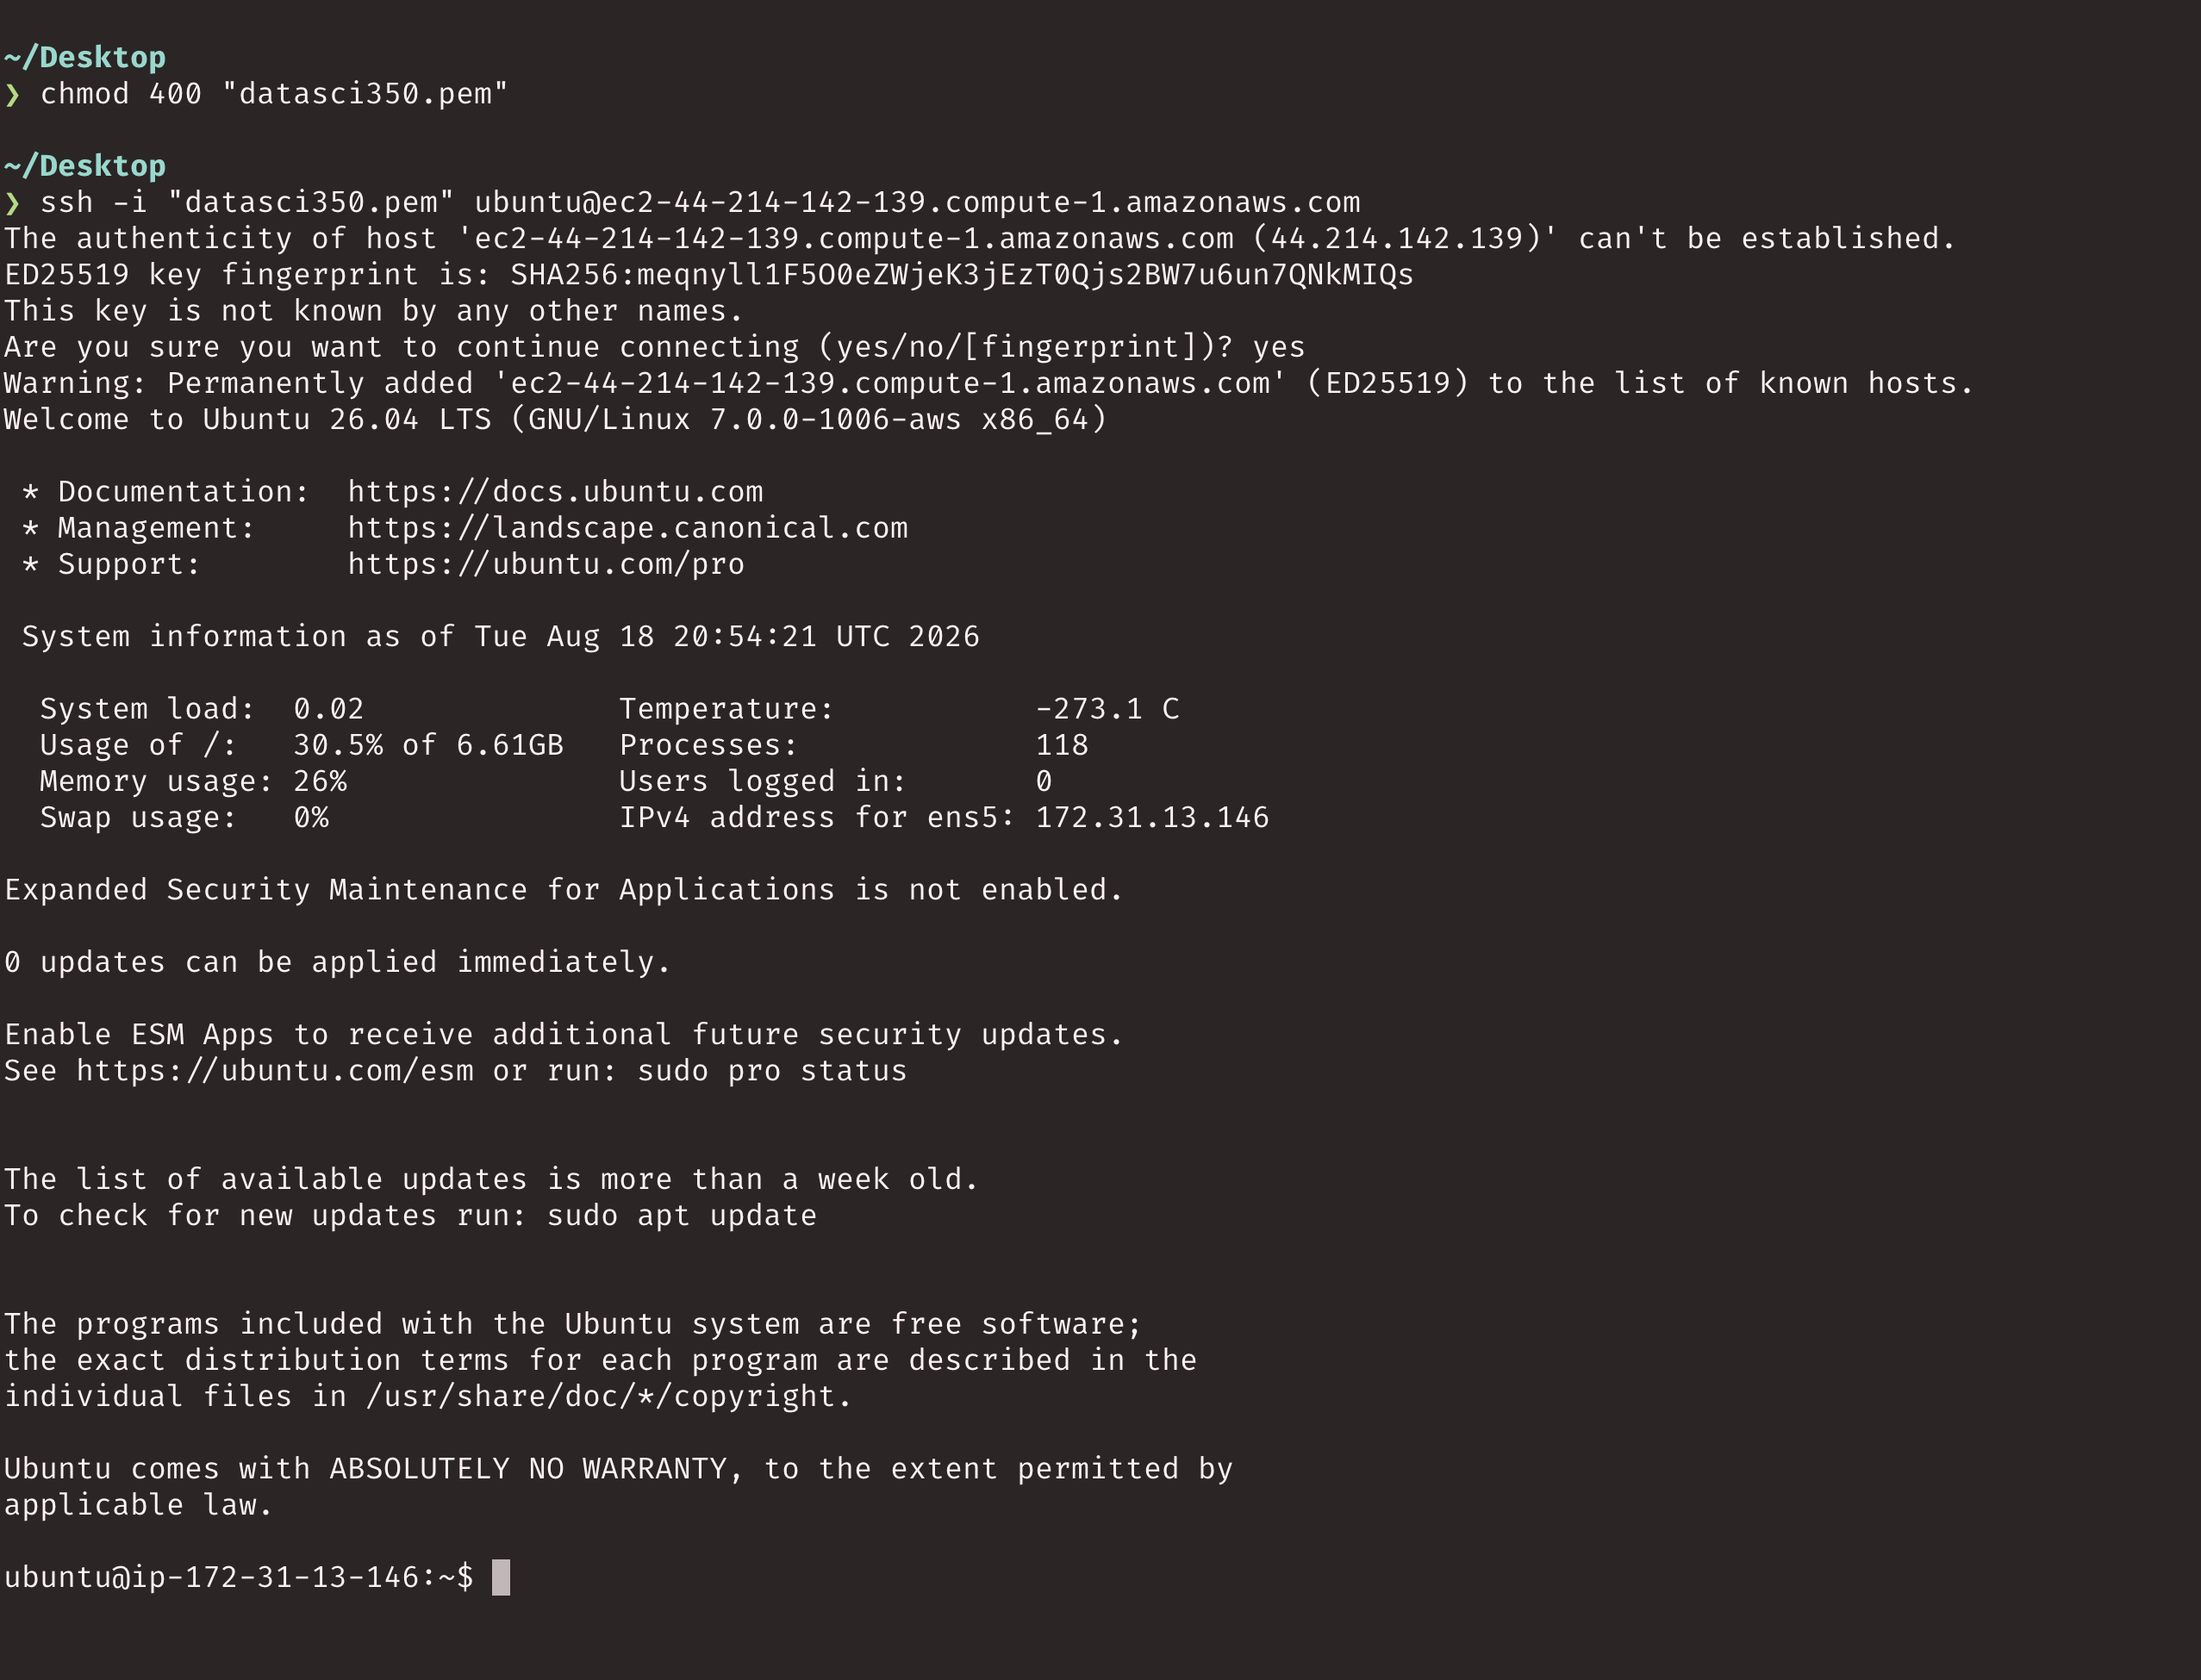
- The first connection asks you to confirm the host fingerprint
- Type
yesonce, and SSH remembers the machine - The banner shows what you rented: Ubuntu 26.04 LTS, a 6.61 GB disk that is 30% full, 118 processes, and no other users
- The prompt changes to
ubuntu@ip-172-31-13-146 - Every command now runs on a computer in Virginia
exitlogs you out and returns you to your own machine
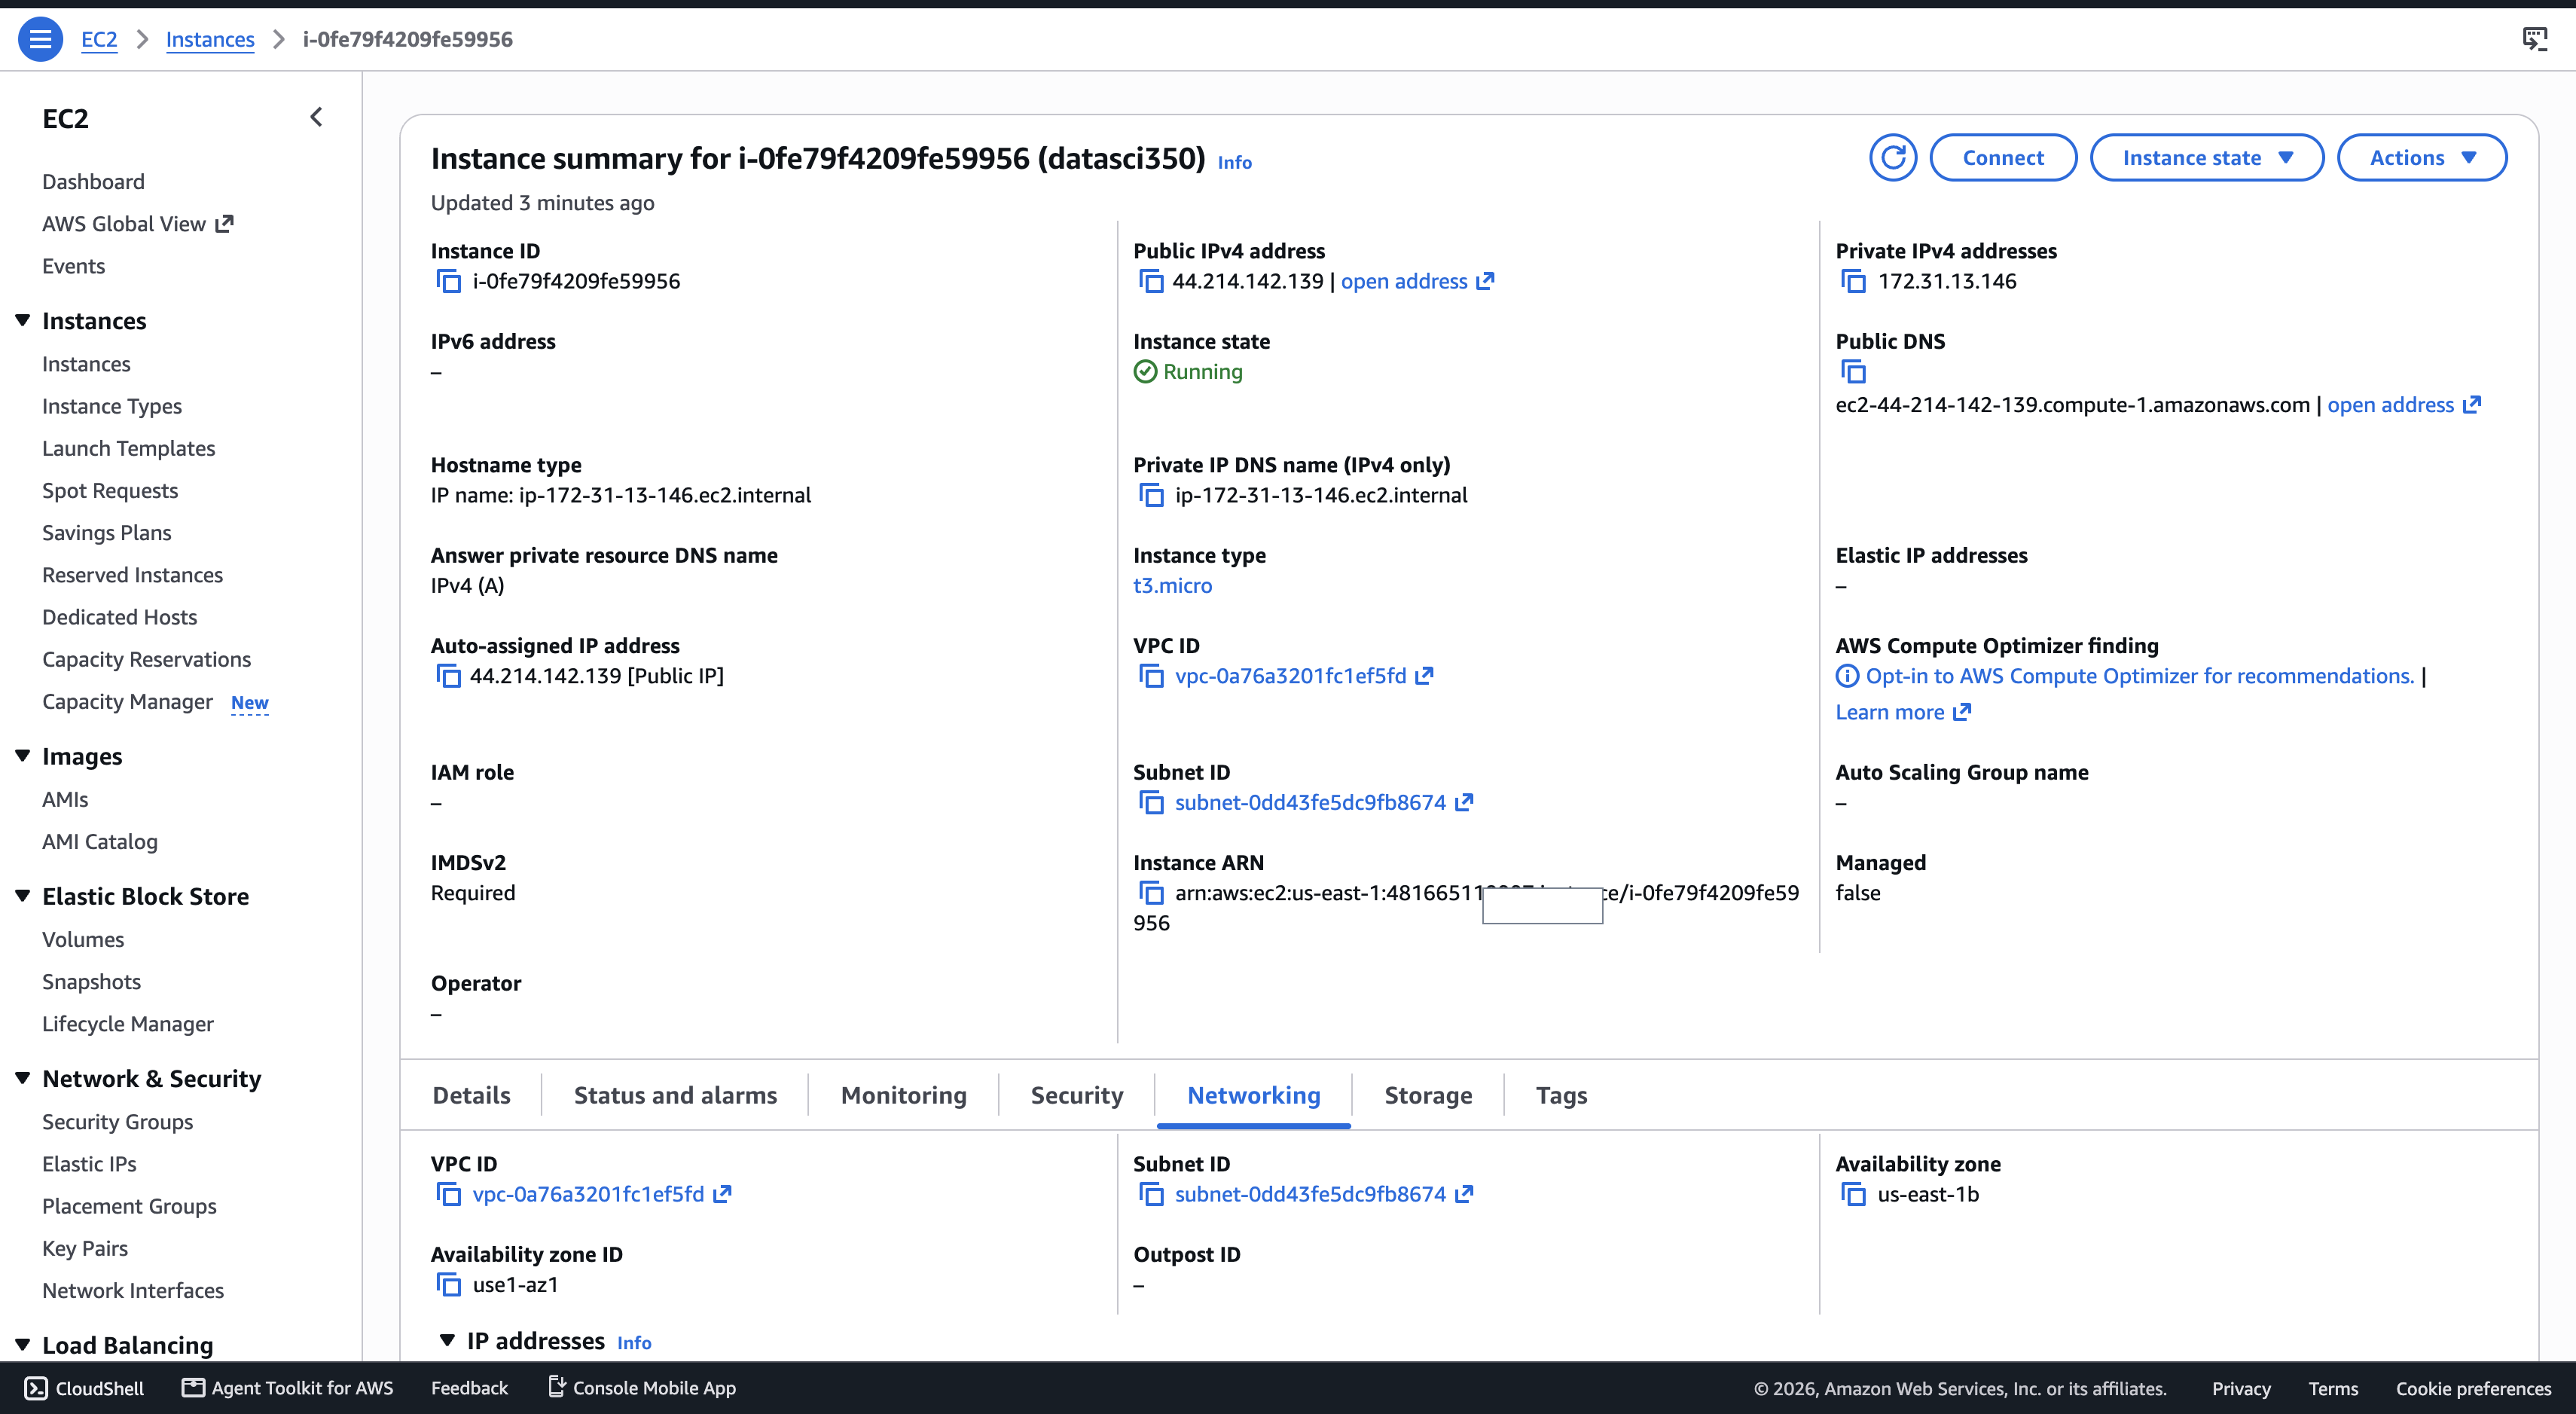
Check the instance details on the AWS Console
- Click the instance ID, or
Instanceson the left - You can see its public IP address, instance type, security group, and key pair
- You can also stop, terminate, or reboot it here (more on this later)
AWS CloudShell
A terminal in the browser, already signed in
- Open it from the bottom left of the console. Nothing to install
- Amazon Linux 2023: 1 vCPU, 2 GiB of RAM, 1 GB of saved storage
- Free: you pay only for the resources you use from it
- The AWS CLI is already signed in as you
- Also there:
git,python3,pip,boto3,jq,wget,ssh,vim,nano,tmux - It runs bash, so your usual commands work
- Sessions end after 20 to 30 idle minutes, or 12 hours
- Unused home directories are deleted after 120 days
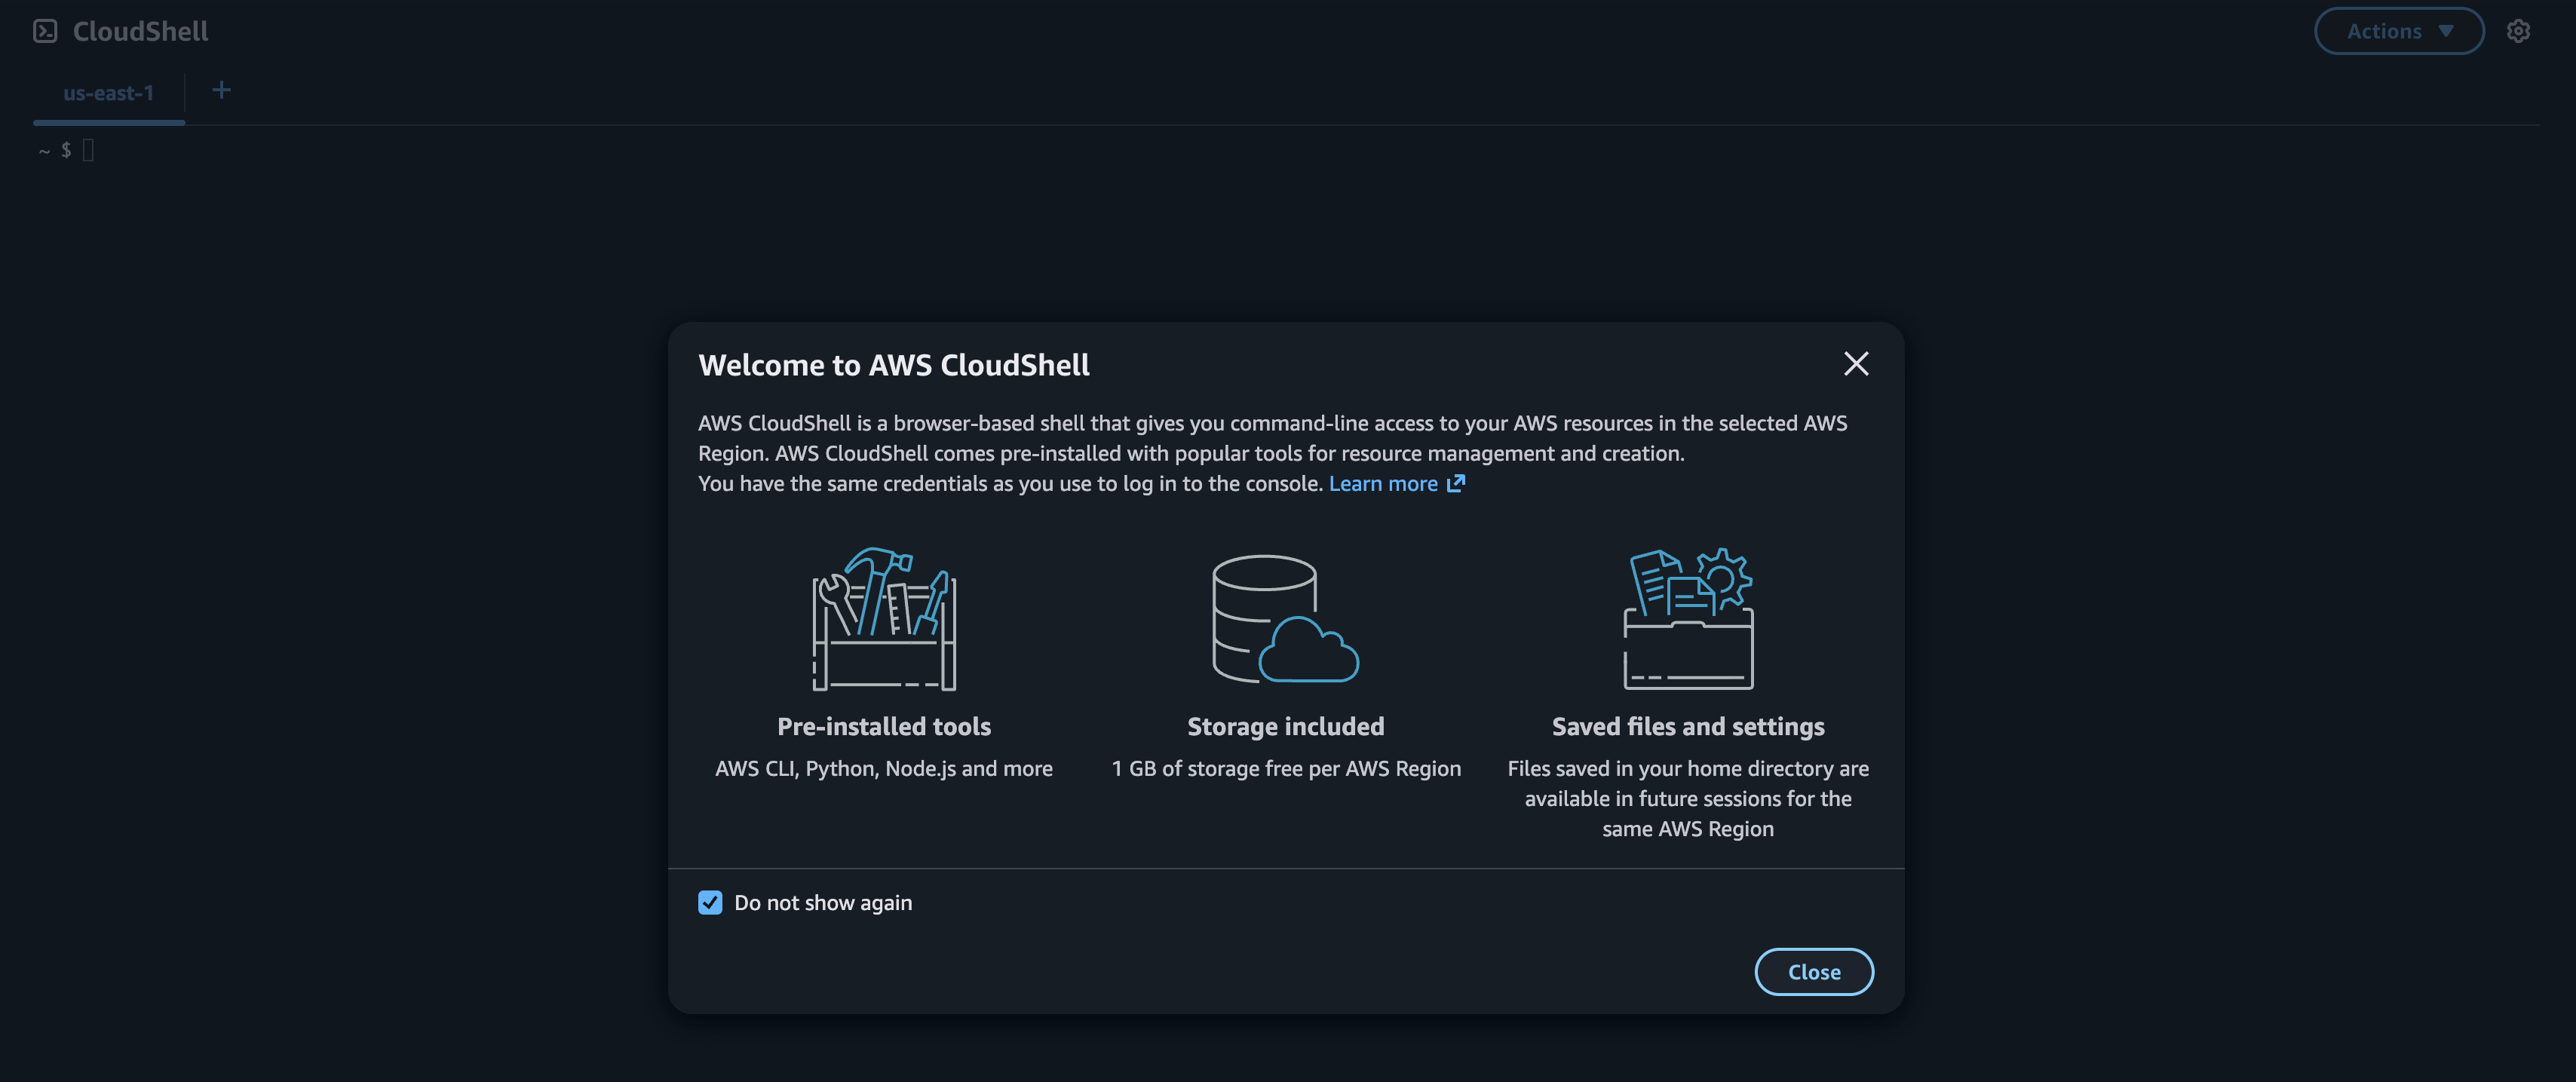
The panel you meet on first launch, stating the tools and the 1 GB of storage per region
- I recommend your local terminal and editor. Use CloudShell as a fallback
CloudShell commands
What is actually new
The shell commands work as usual. What is new is the aws command line, already signed in as you:
| Command | What it does |
|---|---|
aws sts get-caller-identity |
Prints which account and user you are signed in as |
aws ec2 describe-instances --output table |
Lists your instances without leaving the browser |
aws ec2 stop-instances --instance-ids i-... |
Stops an instance from the command line |
aws s3 ls |
Lists your S3 buckets |
aws s3 cp report.pdf s3://my-bucket/ |
Copies a file into a bucket |
sudo dnf install <package> |
Installs software for this session only |
- Amazon Linux uses
dnfwhere Ubuntu usesapt - Software installed with
dnfgoes to/usr/bin, which is wiped when the session ends - Keep anything you need in your home directory
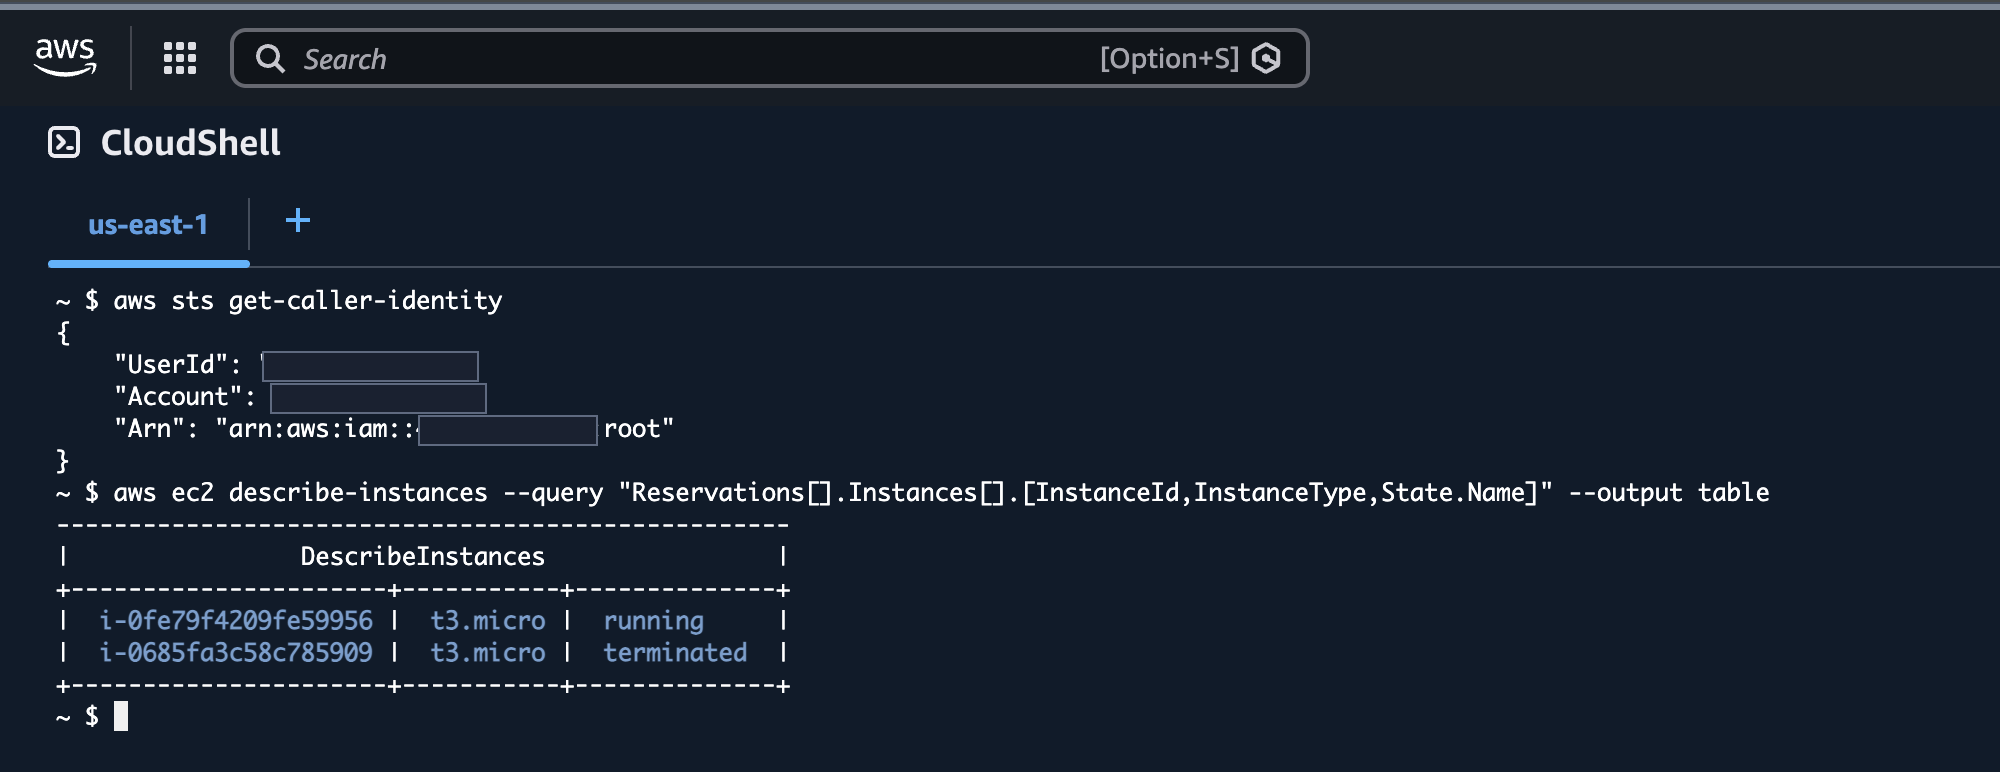
Two aws commands and what they return. The account number is blanked out, and describe-instances reports one machine running and one already terminated. More commands here
CloudShell as a way back in
When your own terminal will not cooperate
- The WSL problem: Windows ignores
chmod 400on files in the Windows filesystem, so SSH refuses the key - CloudShell avoids this, because the key goes to a Linux machine:
- Open CloudShell from the console.
- Choose
Actions, thenUpload file. - Select your
.pemfile. It arrives in/home/cloudshell-user. - Run
chmod 400 your-key.pem. - Run the same
ssh -i ...command the console gave you.
- The instance does not care that the connection came from a browser tab
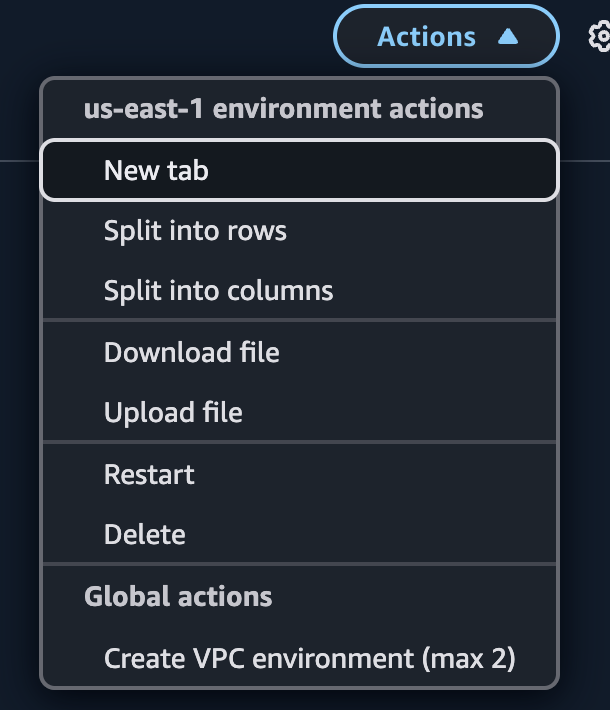
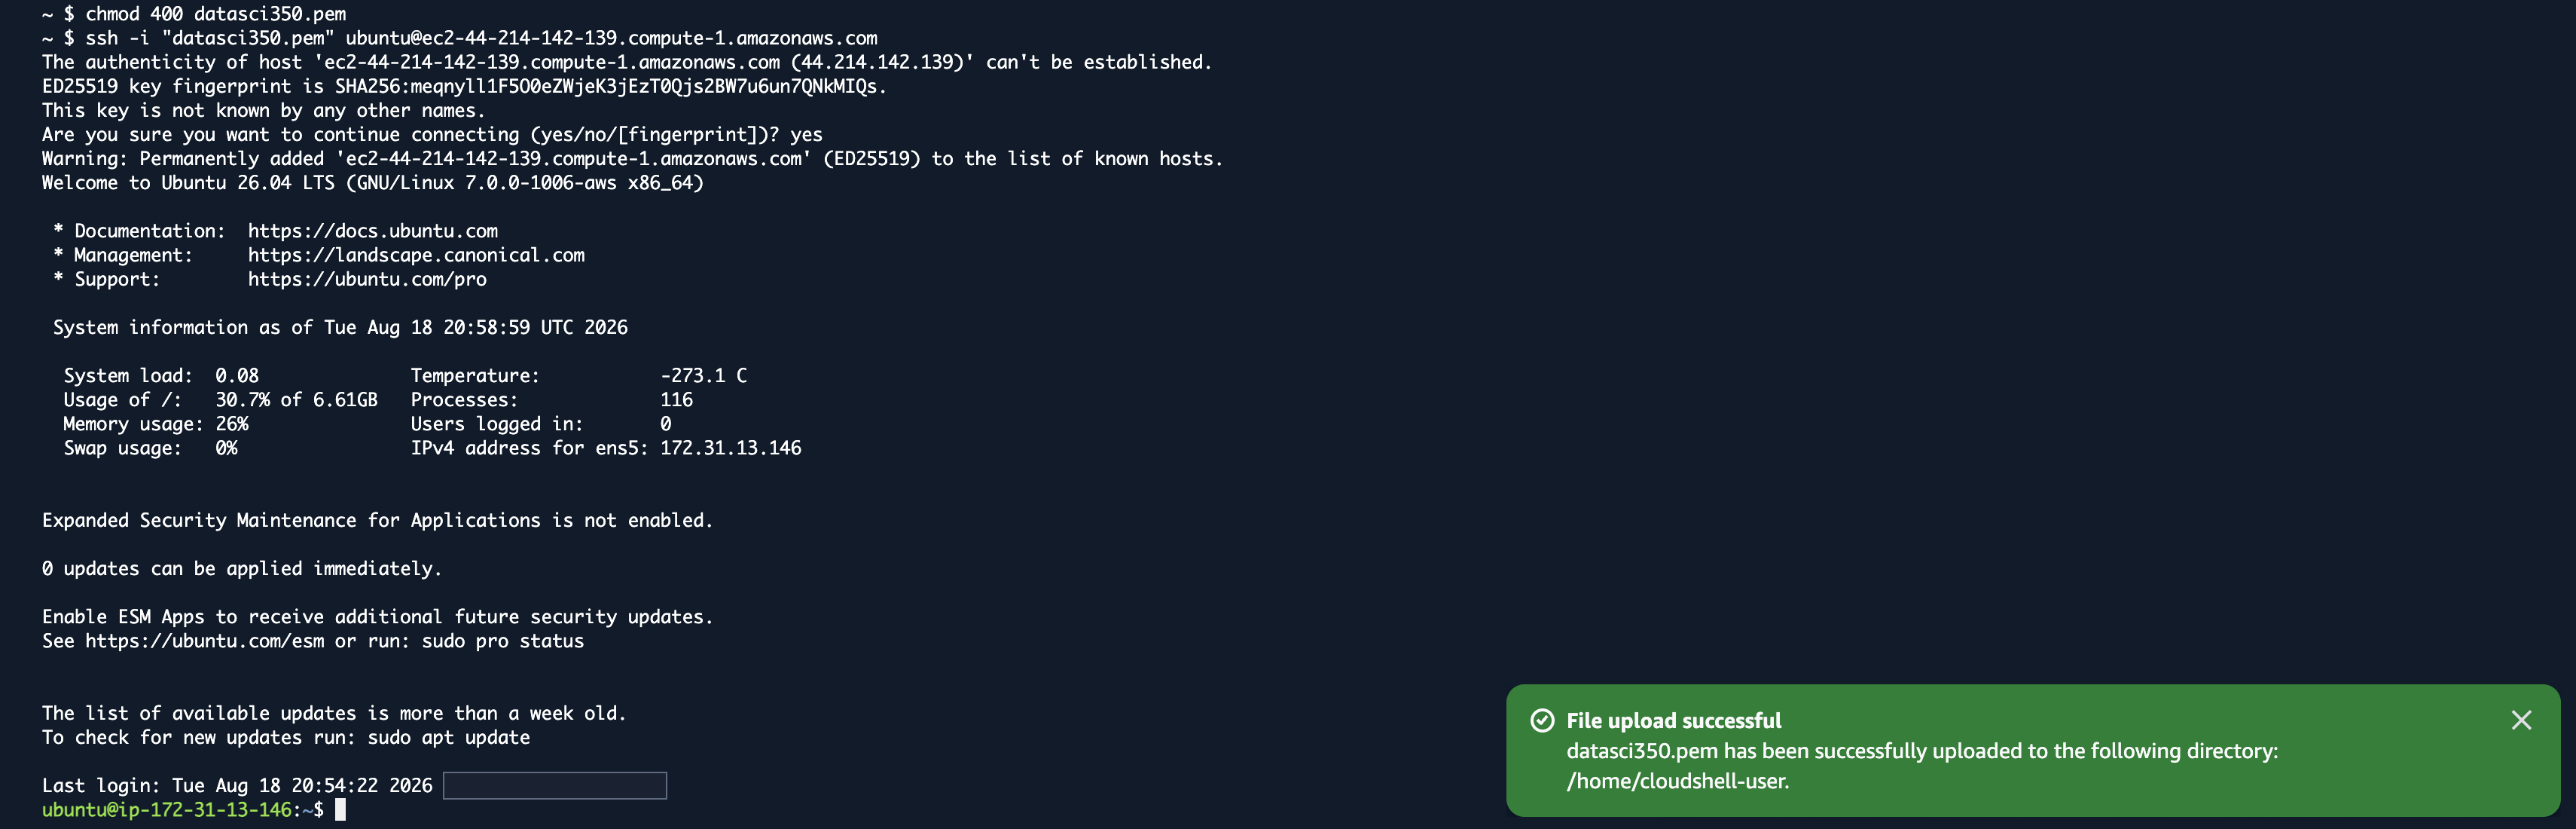
The whole thing from a browser tab: the upload confirmation, chmod 400, and an Ubuntu 26.04 prompt on the instance
- CloudShell times out after 20 to 30 idle minutes, and your SSH connection goes with it
Step 07: Update and install software
- First, refresh the package list:
sudo apt update - Then install the latest updates:
sudo apt upgrade-yanswersyesto every prompt:sudo apt update && sudo apt upgrade -y
- Install software with
sudo apt install- Python 3:
sudo apt install python3 - pip:
sudo apt install python3-pip
- Python 3:
- You can install Jupyter and anything else the same way
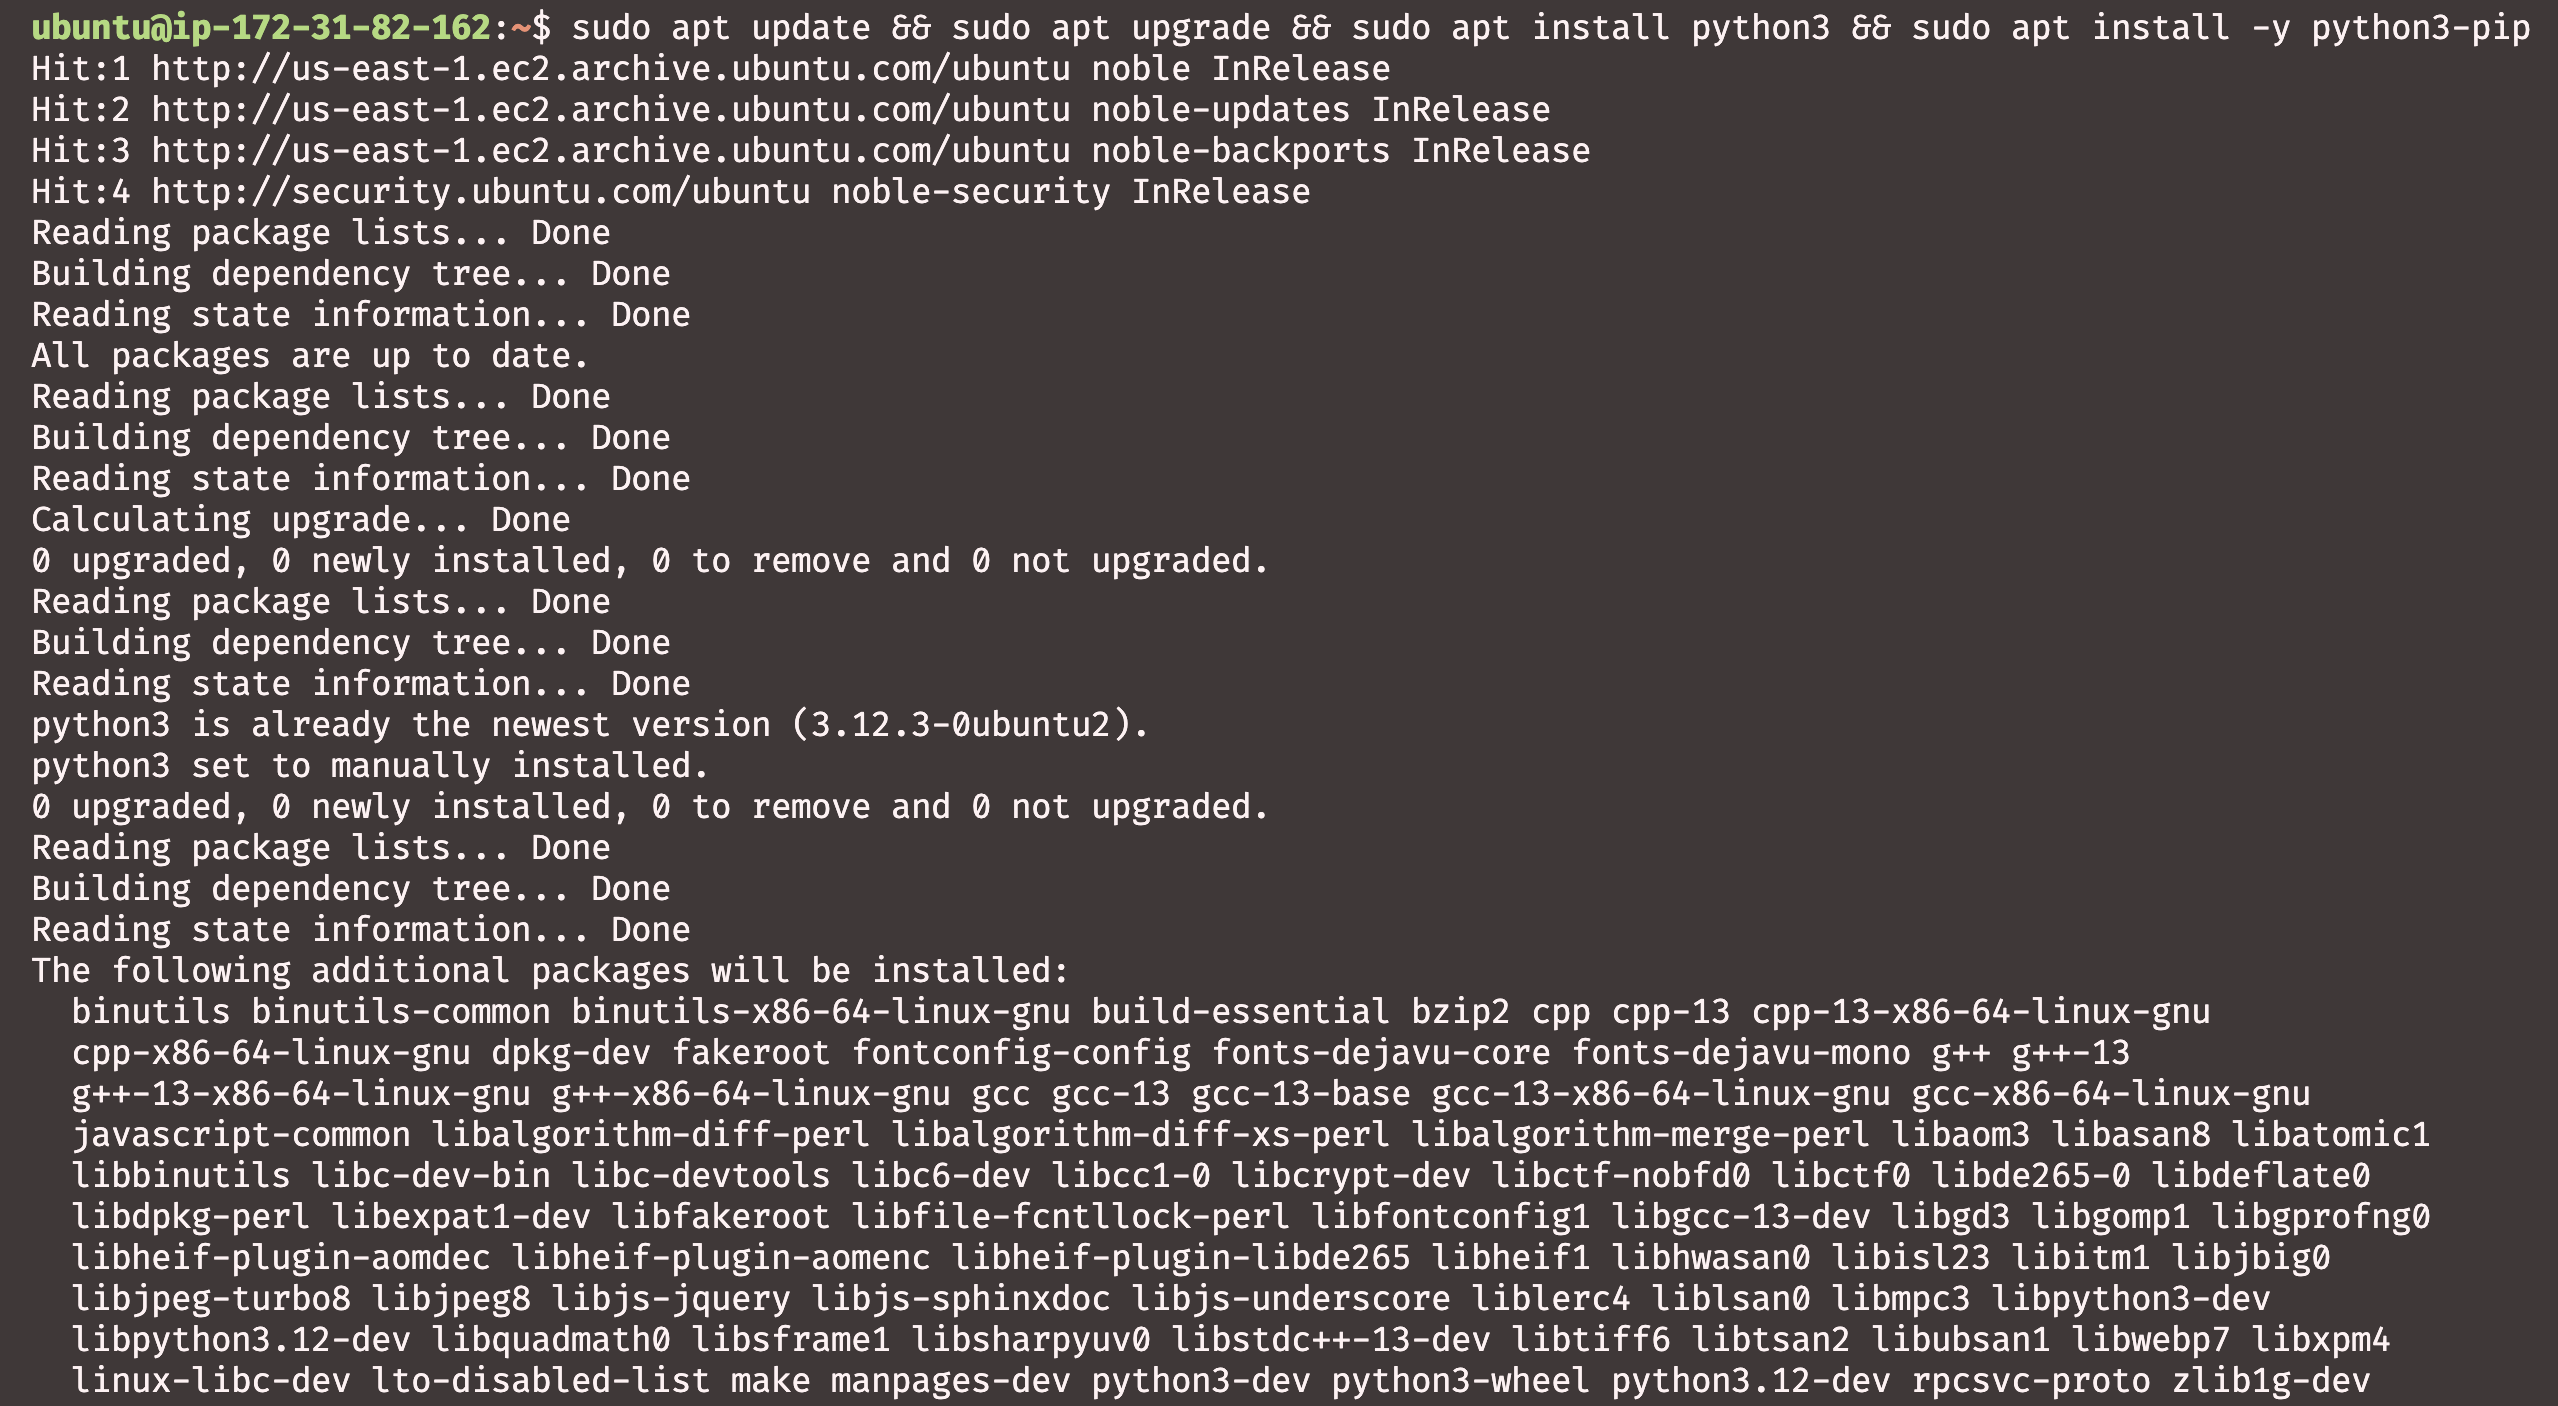
sudo apt update && sudo apt upgrade -y && sudo apt install -y python3 python3-pip
pip install gives an externally-managed-environment error on Ubuntu. Use sudo apt install python3-<package> or a virtual environment
Adding files to your instance
scpmeans “secure copy”. It moves files over SSH-istands for “identity file”, your key- The first path is the source, and the second is the destination
- Open a new local terminal.
scpruns on your own machine, not on the instance:

- Replace
XXXXXXwith your public DNS, from the Instances page - Keep the
:~at the end. It means the home directory - In your SSH session,
lsshows the file andpython3 hello.pyruns it
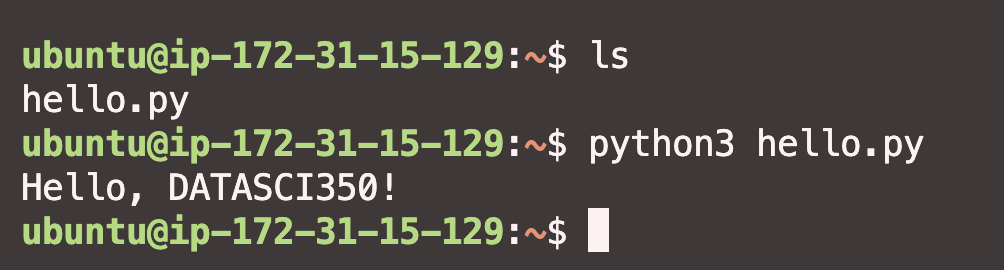
Stopping and terminating your instance
- Stop or terminate instances you are not using
- Stop pauses it. Compute is not charged, but the disk still is
- Terminate deletes it, with every file on it
- A restarted instance gets a new IP address, so your old
sshcommand stops working - A
t3.microleft on for a month costs about $12: $7.60 compute, $3.65 IP address, $0.64 disk - Stop, terminate, or reboot from the Instances page
- Let’s terminate ours now! 🛑
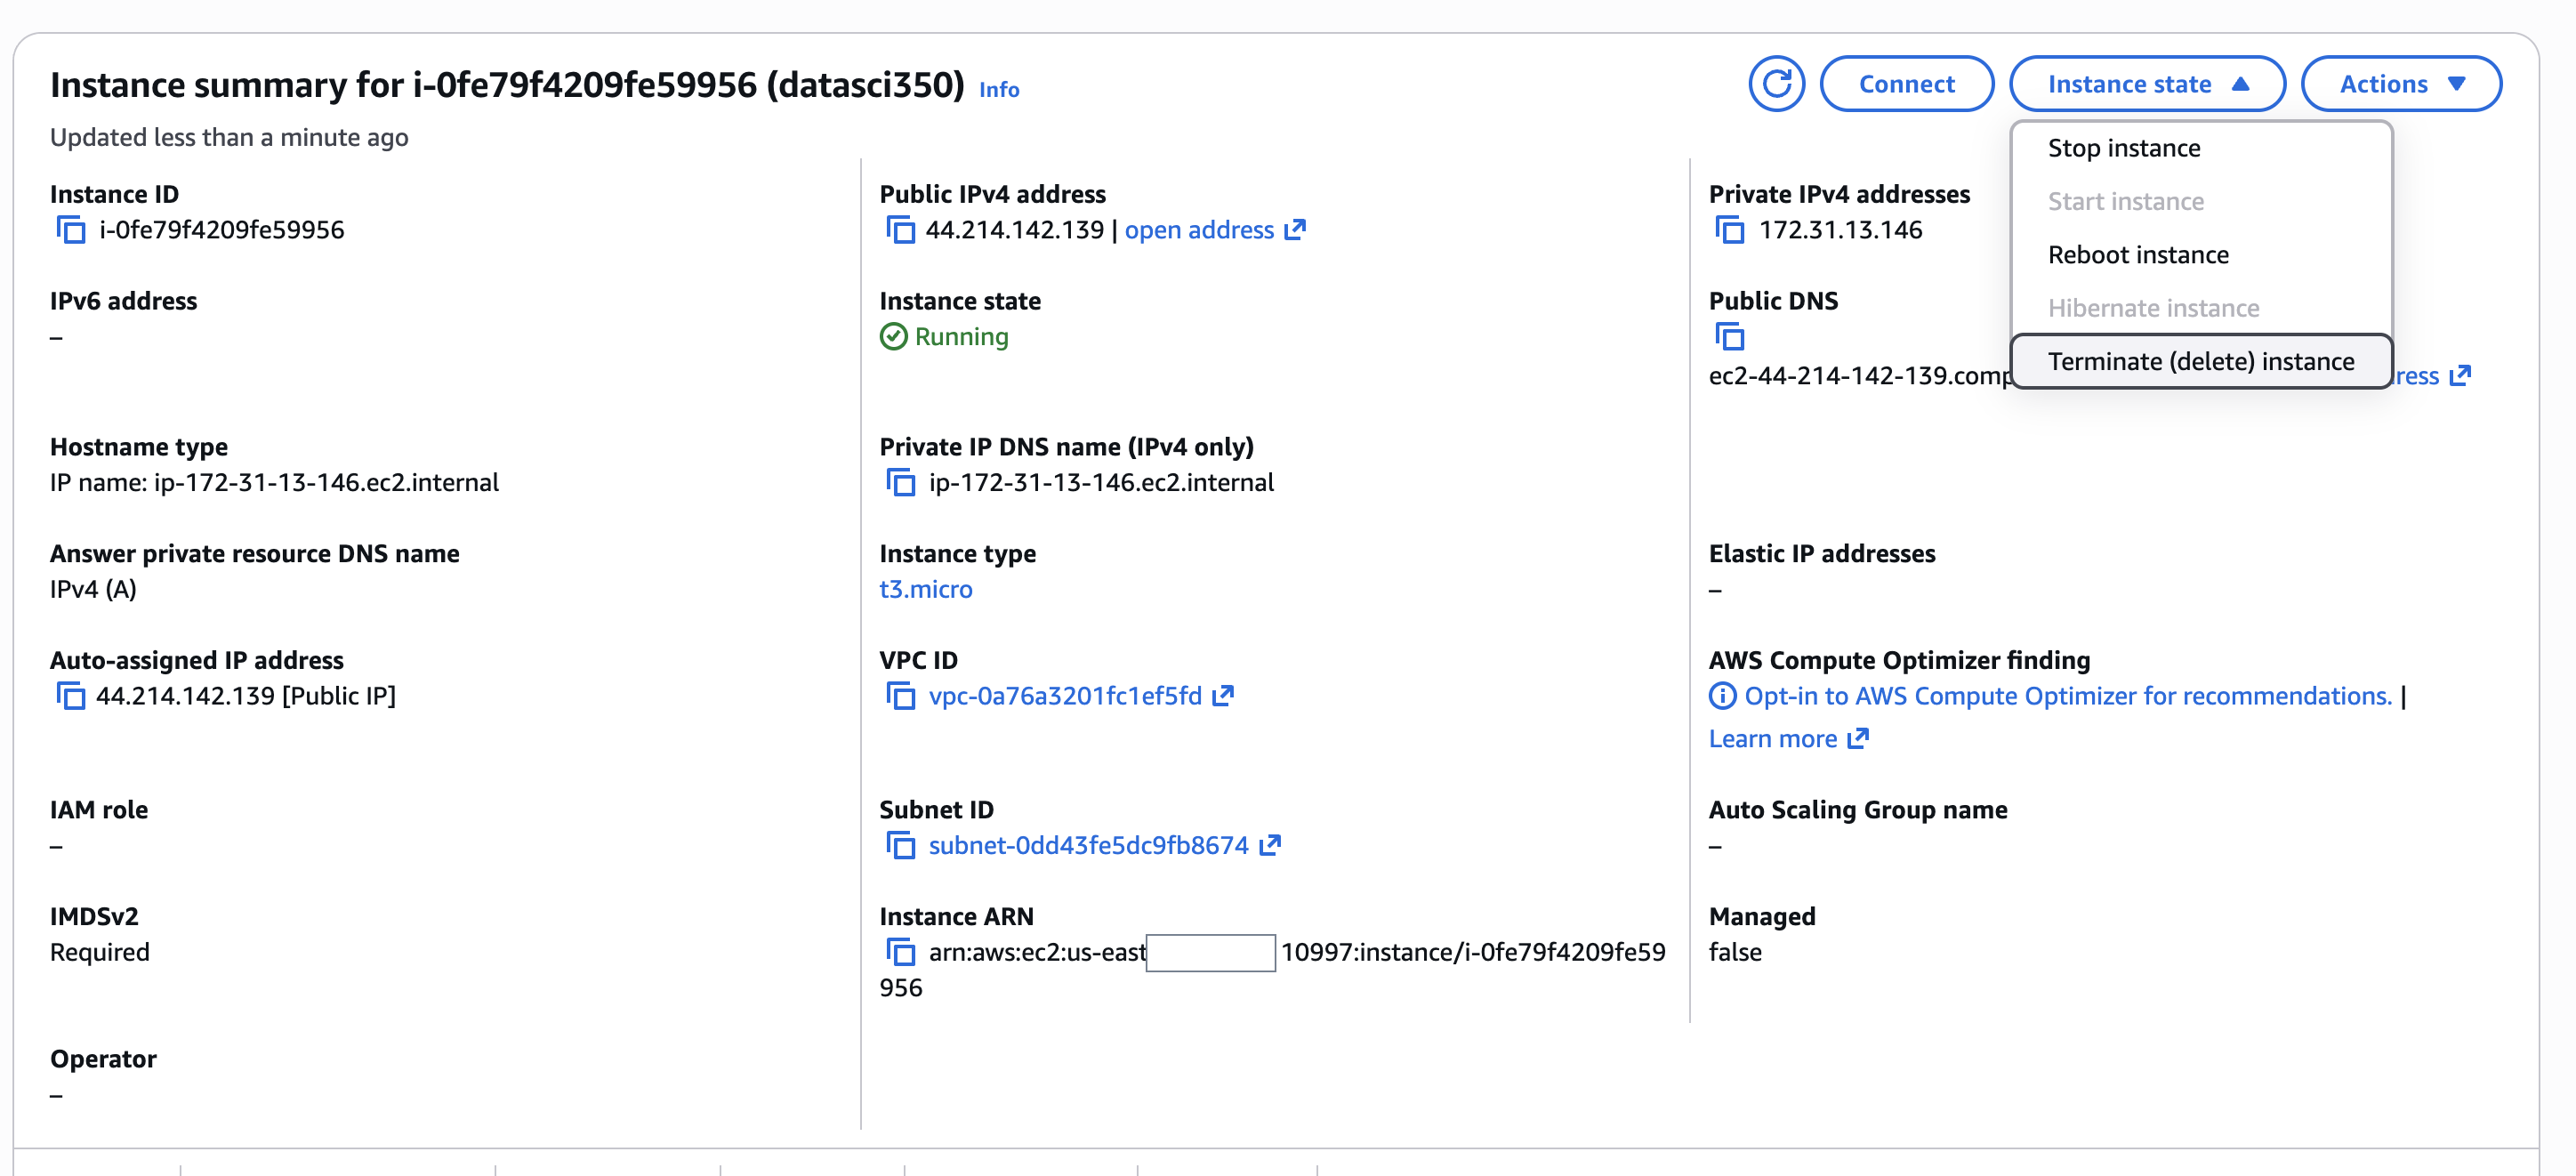
The Instance state menu. Terminate (delete) instance is the last entry

Afterwards both instances read Terminated, and the Public IPv4 DNS column is empty. The address is gone
Activity 01
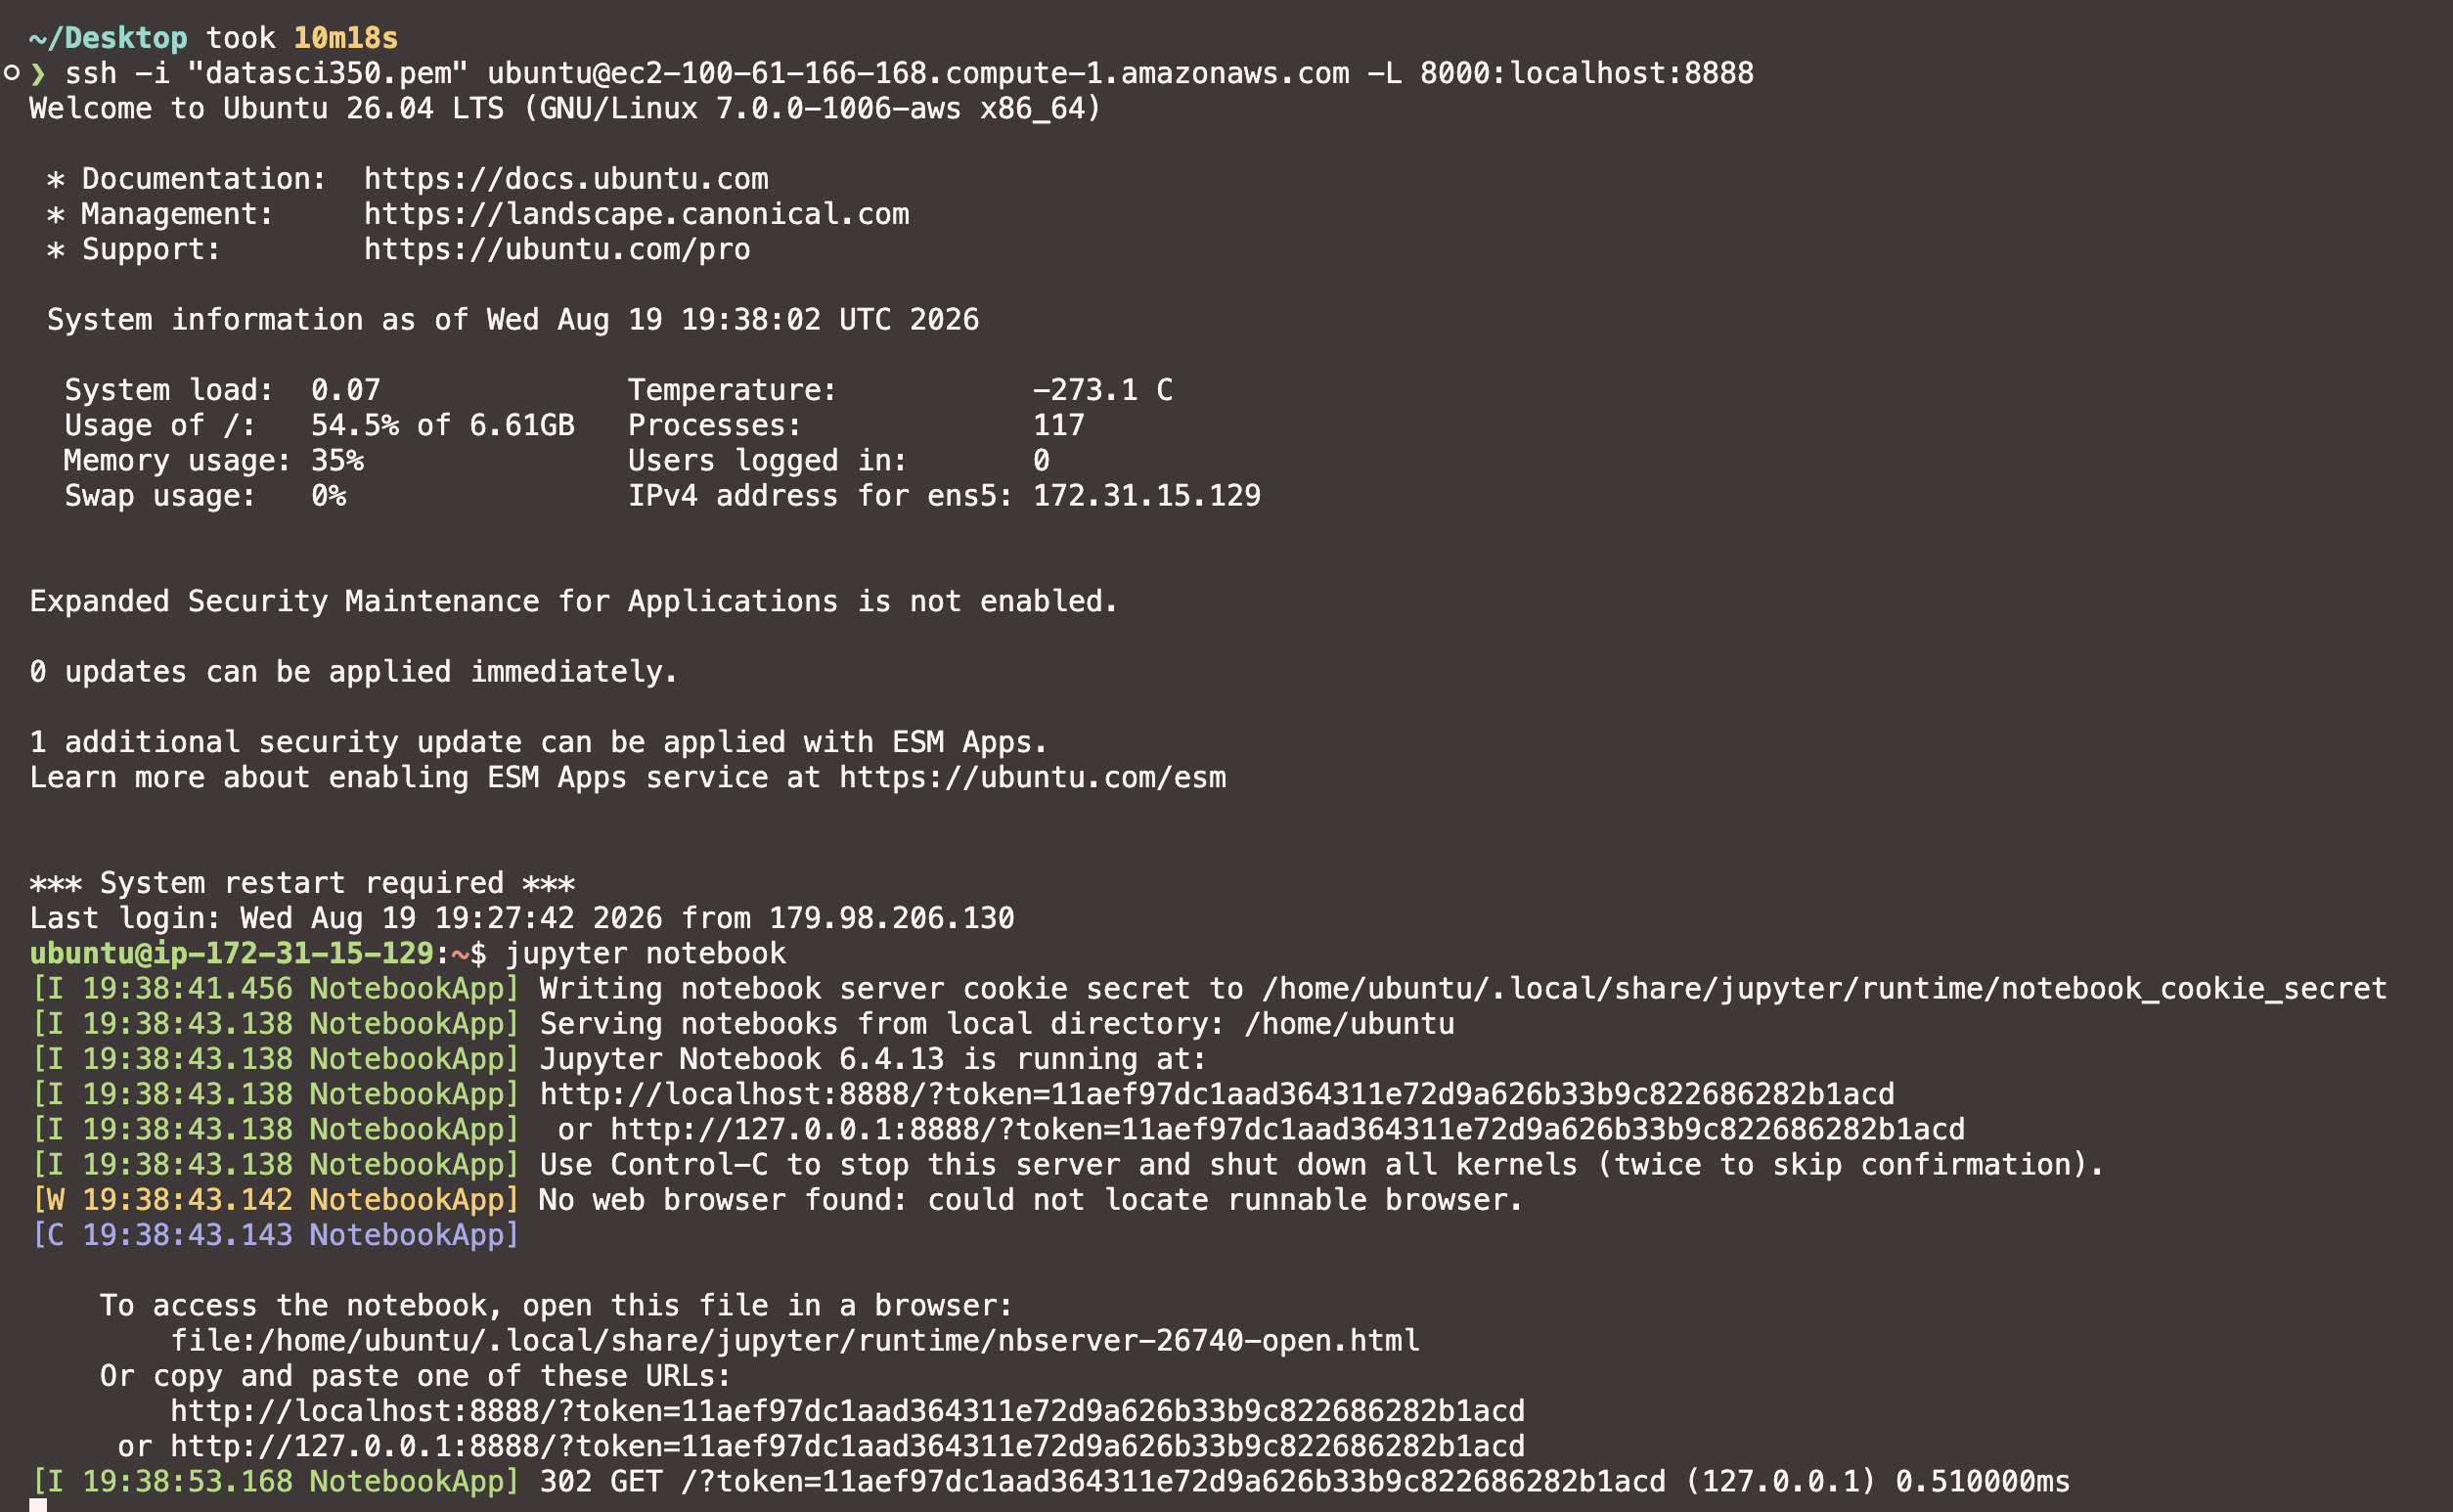
Activity 01
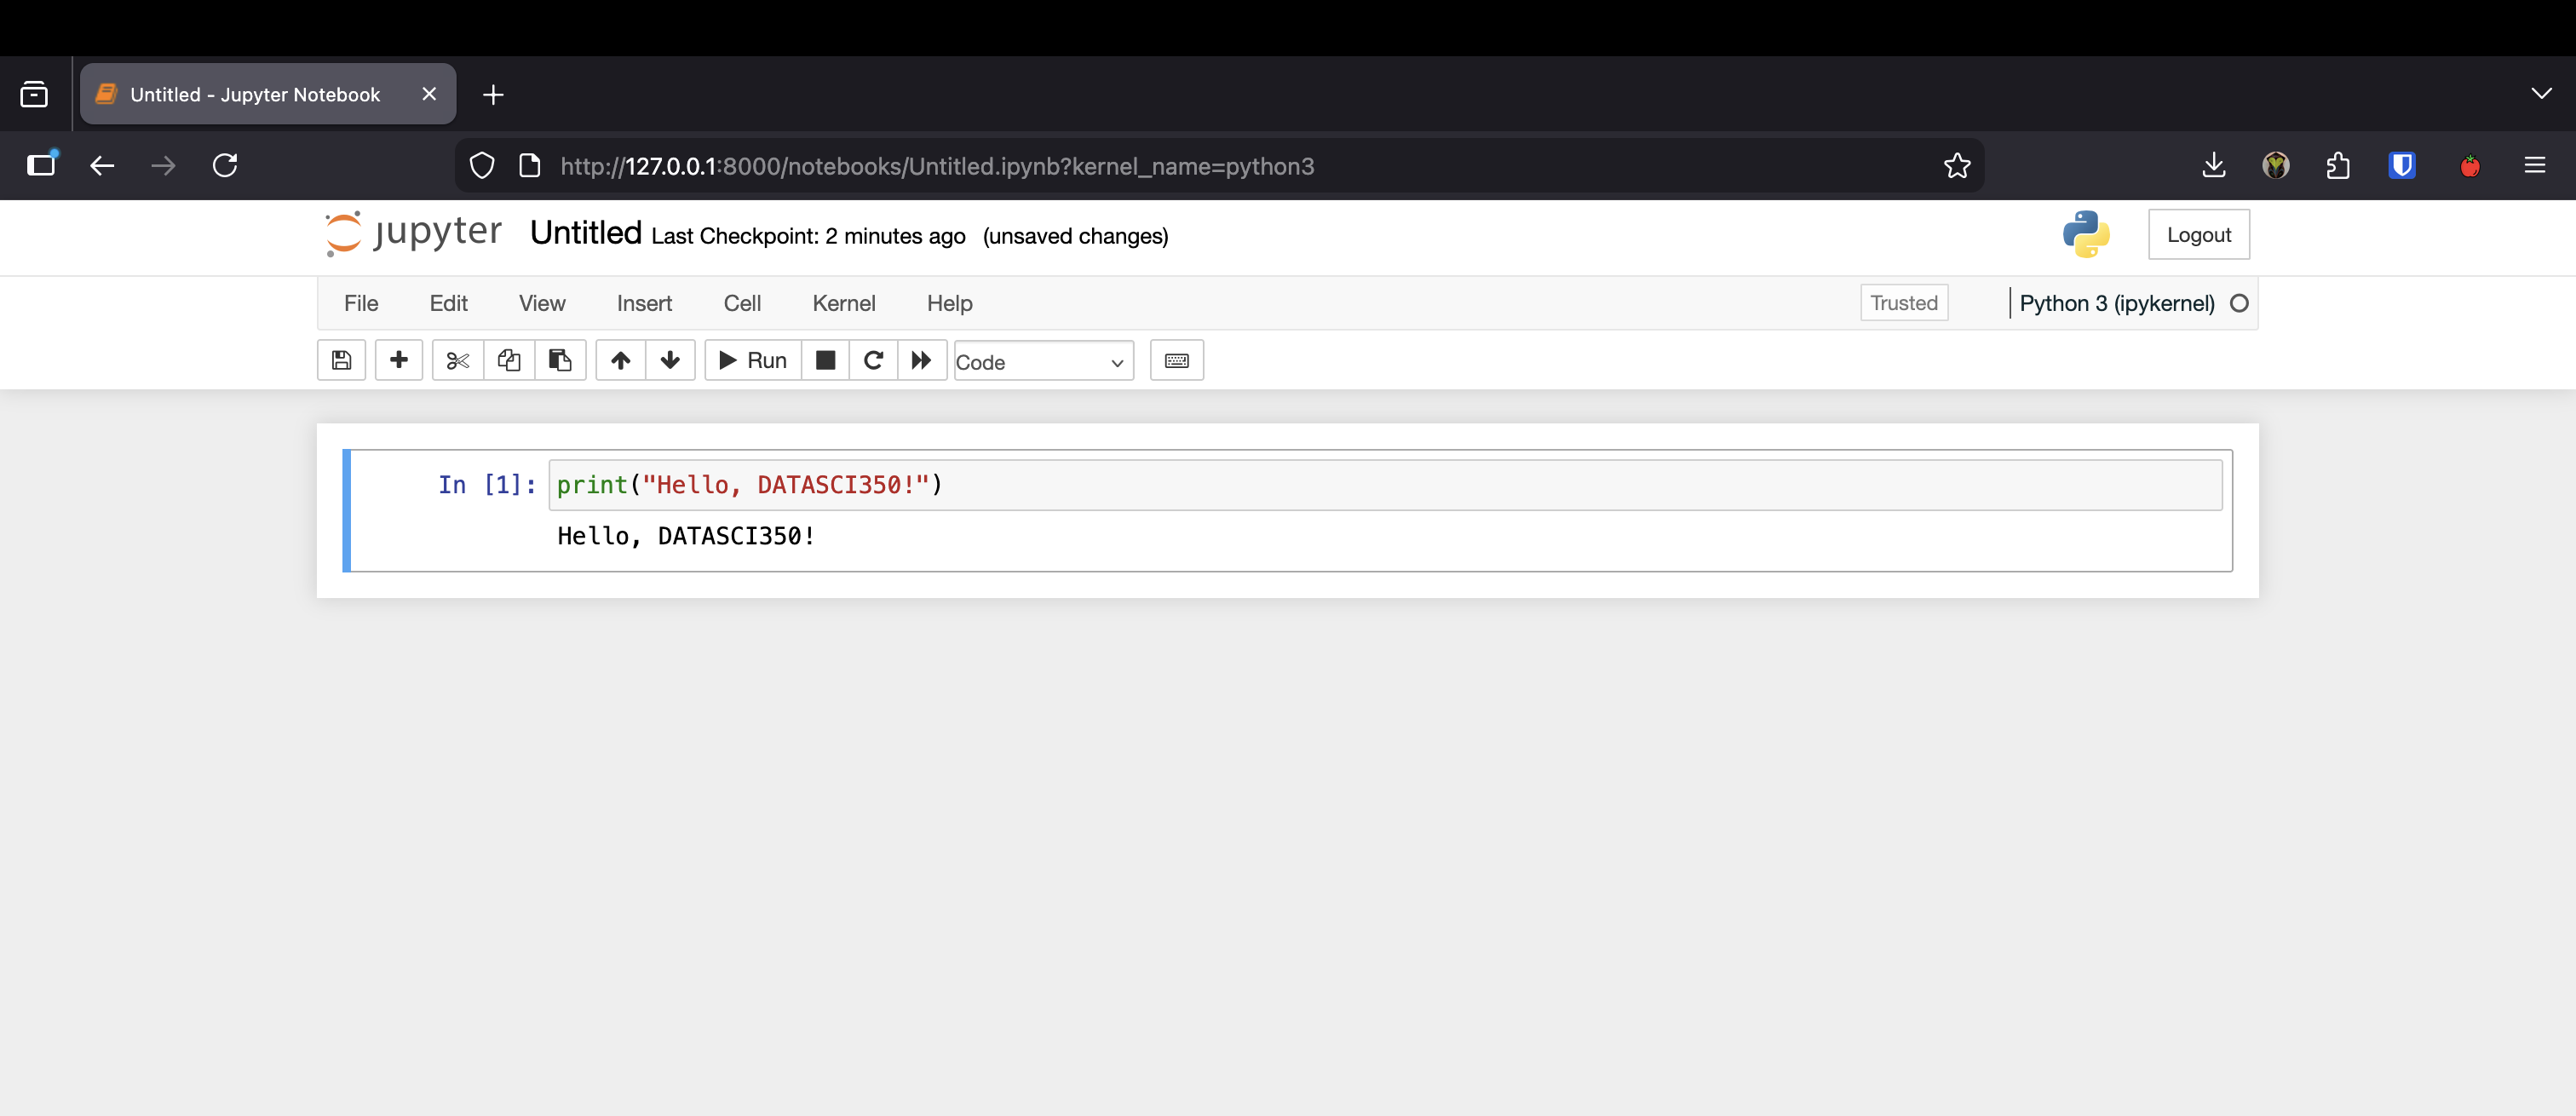
Activity 02 Result
When you run the activity, you should get a graph like this one: